
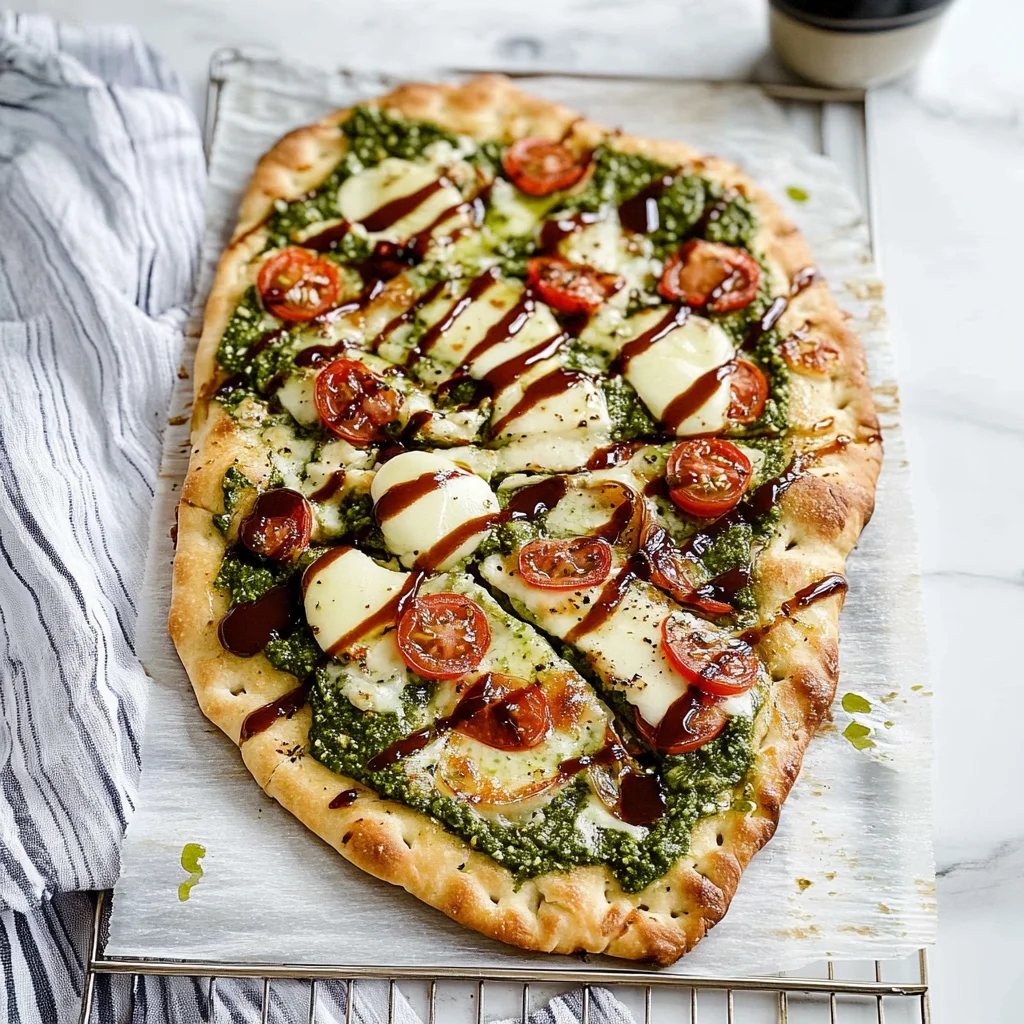
Imagine the warm, comforting aroma of freshly baked flatbread wafting through your kitchen, beckoning you to take a bite. With its golden-brown exterior and soft, pillowy interior, this delightful creation is not just a simple bread; it’s a canvas for your culinary imagination, ready to be adorned with vibrant toppings or embraced as a companion to your favorite dishes.
Flatbread has a way of bringing people together, whether it’s at a cozy family dinner or a lively gathering with friends. I recall the laughter and chatter around the table as we gathered around a platter of homemade flatbread, each piece disappearing as quickly as it was served. Perfect for any occasion, this versatile staple promises an incredible flavor experience that will keep you coming back for more.
Why Is flatbread So Irresistibly Good?
Quick and Easy: In just 15 minutes of prep and 10 minutes of cooking, you can whip up fresh flatbread that’s perfect for any meal.
Versatile Base: Use it as a canvas for your favorite toppings or serve it alongside soups and salads—it’s always a hit!
Simple Ingredients: With just four pantry staples like all-purpose flour and olive oil, you’ll enjoy homemade goodness without the fuss.
Crowd-Pleaser: Its warm, inviting flavor makes this flatbread a favorite at family gatherings and dinner parties alike!
flatbread Ingredients
- 2 cups all-purpose flour – This forms the base of your flatbread, providing structure and a lovely texture.
- 1 teaspoon salt – Enhances flavor; feel free to adjust according to your taste preferences.
- 3/4 cup water (warm) – Warm water helps activate the gluten, making the dough easier to work with.
- 1 tablespoon olive oil – Adds richness and a subtle flavor, perfect for enhancing your homemade flatbread.
Step-by-Step flatbread

1. Combine ingredients: In a mixing bowl, combine 2 cups of all-purpose flour and 1 teaspoon of salt. Gradually add in 3/4 cup of warm water and 1 tablespoon of olive oil, stirring until a dough begins to form.
2. Knead the dough: Transfer the mixture onto a floured surface and knead for about 5 minutes. You’ll want the dough to feel smooth and elastic, perfect for rolling out later.
3. Rest the dough: Cover the kneaded dough with a damp cloth and let it rest for 10 minutes. This short break allows the gluten to relax, making it easier to roll out.
For the Flatbreads:
4. Divide and roll: After resting, divide the dough into 4 equal pieces. Roll each piece into a thin circle on a floured surface, aiming for about 1/8 inch thick.
5. Cook the flatbreads: Heat a skillet over medium-high heat. Cook each flatbread for about 2-3 minutes on each side until they are lightly browned and cooked through—look for golden spots!
6. Keep warm: Once cooked, remove them from the skillet and keep warm until you’re ready to serve your delicious flatbreads alongside your favorite dishes.
Optional: Serve with a drizzle of olive oil or your favorite dip!
Exact quantities are listed in the recipe card below.
Tips for the Best flatbread
- Flour Matters: Use good quality all-purpose flour for a soft and pliable flatbread. Avoid overworking the dough to keep it tender.
- Warm Water: Ensure your water is warm but not hot; this helps activate the gluten without cooking the dough, leading to a better texture.
- Kneading Technique: Knead just until smooth and elastic; over-kneading can lead to tough flatbreads. Five minutes is usually perfect!
- Resting Time: Don’t skip the resting step! Letting the dough sit for 10 minutes allows it to relax, making rolling easier and more enjoyable.
- Cooking Temperature: Keep your skillet at medium-high heat; too low can result in chewy flatbreads, while too high may burn them before they cook through.
- Serving Warm: Serve flatbreads warm for optimal flavor and texture. If they cool down, simply reheat briefly in the skillet.
How to Store and Freeze flatbread
- Room Temperature: Keep your flatbread wrapped in a clean kitchen towel or in a paper bag for up to 2 days to maintain its softness.
- Fridge: If you need to store it longer, place the flatbread in an airtight container and refrigerate for up to 5 days.
- Freezer: For extended storage, freeze individual flatbreads separated by parchment paper in a freezer-safe bag for up to 3 months.
- Reheating: To enjoy your flatbread again, simply warm it on a skillet over medium heat for about 1-2 minutes per side until heated through.
flatbread Your Way
Feel free to get creative with this recipe and make it as unique as your family’s taste buds!
- Herbed: Add 1 tablespoon of dried herbs (like oregano or rosemary) to the dough for an aromatic twist. This addition will infuse every bite with a burst of flavor, making your flatbread a delightful companion to any meal.
- Whole Wheat: Substitute half the all-purpose flour with whole wheat flour for a heartier option. This not only adds a nutty flavor but also boosts the nutritional value, making your flatbread more filling and wholesome.
- Spicy: Mix in 1 teaspoon of red pepper flakes into the dough for a kick. The heat complements toppings beautifully, giving your flatbread an exciting edge that pairs well with creamy dips or fresh salads.
- Cheesy: Incorporate 1/2 cup of shredded cheese (like mozzarella or cheddar) into the dough. This creates a rich, savory flavor that elevates your flatbread, perfect for serving as a standalone snack or appetizer.
- Garlic: Fold in 2 minced garlic cloves for a robust flavor boost. The aromatic essence of garlic transforms each piece into a fragrant treat that’s irresistible alongside soups or stews.
- Gluten-Free: Use a gluten-free flour blend instead of all-purpose flour for a suitable alternative. This allows everyone to enjoy your delicious creation without worry, ensuring that no one misses out on the fun.
- Cinnamon-Sugar: For a sweet twist, mix in 2 tablespoons of sugar and 1 teaspoon of cinnamon. This version makes an excellent dessert flatbread that pairs well with fruit and yogurt or can be enjoyed on its own as a treat.
Make Ahead Options

Preparing this flatbread recipe is a fantastic choice for meal prep, allowing you to enjoy fresh, homemade flatbreads at any time. You can easily mix the dough in advance by combining 2 cups of all-purpose flour, 1 teaspoon of salt, 3/4 cup of warm water, and 1 tablespoon of olive oil, then kneading until smooth and elastic. Once prepared, cover the dough with a damp cloth and let it rest for up to 24 hours in the refrigerator. When you’re ready to serve, simply divide the chilled dough into four pieces, roll them out into circles, and cook them on a skillet for 2-3 minutes on each side. This method not only saves time but also ensures that your flatbread retains its delightful texture and flavor when cooked fresh!
flatbread Questions Answered
What type of flour is best for making flatbread?
All-purpose flour works beautifully for this flatbread recipe, providing a nice balance of texture and flavor. If you’re looking for a healthier option, you can substitute half of the all-purpose flour with whole wheat flour, which will give your flatbread a slightly nuttier taste and more fiber.
Can I use cold water instead of warm water?
While it’s best to use warm water (around 110°F or 43°C) to help activate the gluten in the dough, you can use cold water if that’s all you have. Just be aware that your dough may need a longer kneading time to achieve that smooth, elastic texture.
How should I store leftover flatbread?
To keep your flatbreads fresh, let them cool completely before storing. Place them in an airtight container or wrap them tightly in plastic wrap. They’ll last up to 3 days at room temperature or up to a week in the refrigerator. Reheat them on a skillet for that freshly cooked taste!
Can I freeze the flatbreads?
Absolutely! Once cooled, place parchment paper between each flatbread and stack them in a freezer-safe bag or container. They can be frozen for up to 2 months. To enjoy, simply thaw at room temperature and reheat in a skillet for about 1-2 minutes per side.
What can I serve with flatbread?
The beauty of this flatbread is its versatility! Serve it alongside soups and stews, use it as a base for pizzas or wraps, or pair it with dips like hummus or tzatziki. Each serving is about 150 calories, making it a light yet satisfying addition to any meal!
What if my dough is too sticky?
If your dough feels too sticky while kneading, don’t fret! Simply sprinkle a little extra flour onto your work surface and hands as needed until you reach that smooth and elastic consistency. Aim for about 5 minutes of kneading—this will help develop the right texture for perfect cooking results!
Flatbread
Ingredients
Method
- In a mixing bowl, combine the flour and salt. Gradually add the warm water and olive oil, mixing until a dough forms.
- Knead the dough on a floured surface for about 5 minutes until smooth and elastic.
- Cover the dough with a damp cloth and let it rest for 10 minutes.
- Divide the dough into 4 equal pieces and roll each piece into a thin circle using a rolling pin.
- Heat a skillet over medium-high heat. Cook each flatbread for about 2-3 minutes on each side until lightly browned and cooked through.
- Remove from the skillet and keep warm until serving.