
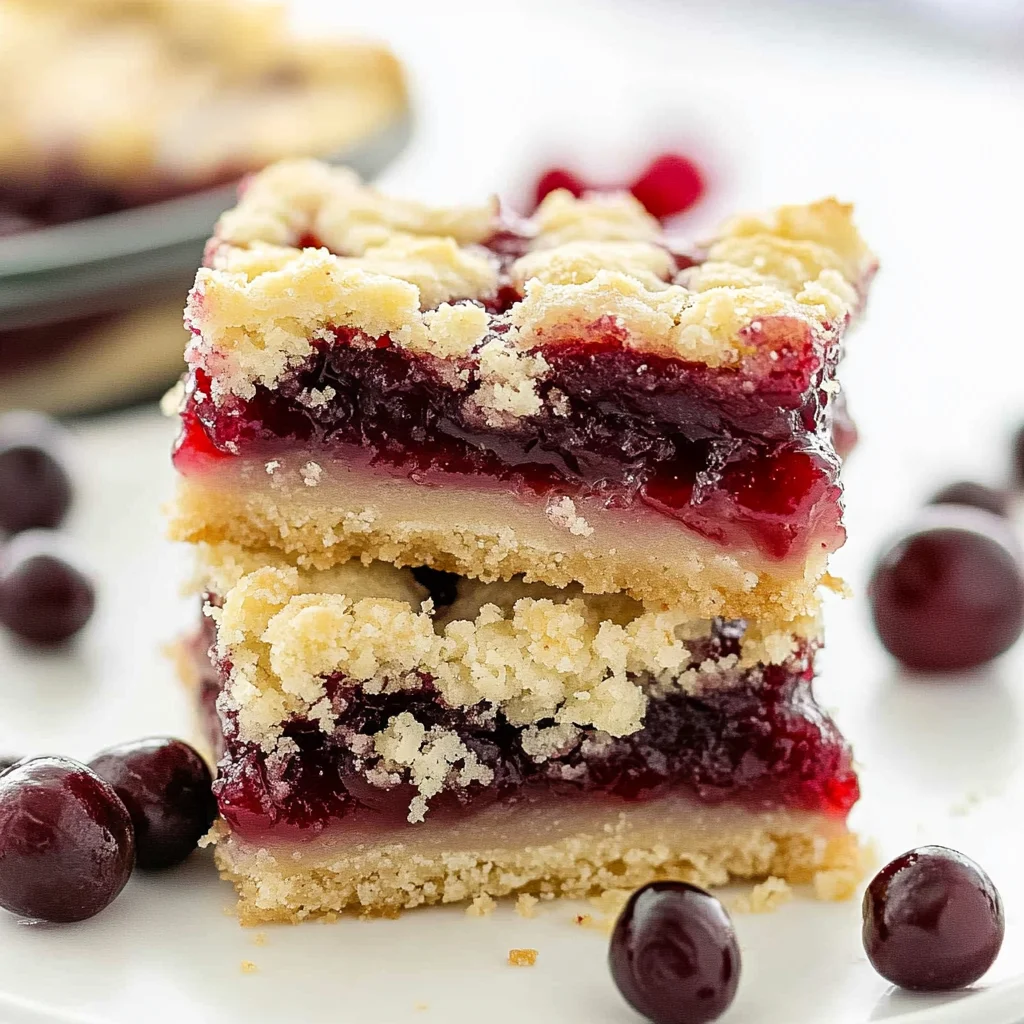
Imagine sinking your teeth into a warm cherry pie bar, where the buttery crust crumbles delightfully beneath your fingers, and the sweet, tangy cherry filling bursts with flavor. The aroma wafts through the air, instantly transporting you to a sun-kissed picnic on a lazy summer afternoon, surrounded by laughter and the clinking of glasses filled with lemonade.
These cherry pie bars are more than just a snack; they’re an invitation to relive cherished memories, whether it’s a family gathering or a cozy evening with friends. Each bite promises to evoke smiles and nostalgia, making any occasion feel extra special. Get ready for an explosion of flavor that will have your taste buds dancing with delight as you indulge in this delightful treat.
Why Is cherry pie bars So Irresistibly Good?
Delightful flavors come together in these cherry pie bars, making them a must-try! Buttery crust made with just flour, sugar, and butter creates a perfect base that complements the sweet cherry filling. Fresh or frozen cherries burst with flavor, while a hint of lemon juice adds brightness. Quick preparation means you’ll be savoring these treats in no time—just 15 minutes to prep! Crowd-pleaser status is guaranteed; they’re perfect for parties or cozy nights at home.
cherry pie bars Ingredients
- For the Crust and Topping
- 1 cup all-purpose flour – This provides the base for your buttery crust, ensuring a delightful texture.
- 1/2 cup granulated sugar – Sweetens the crust while also helping it achieve a lovely golden color as it bakes.
- 1/2 cup unsalted butter (softened) – Creates a rich and tender crust; make sure it’s softened for easy mixing.
- 1/4 teaspoon salt – Balances the sweetness of the sugar, enhancing all the flavors in your cherry pie bars.
- 1 large egg – Acts as a binding agent for the crust, giving it structure and richness.
- For the Cherry Filling
- 2 cups fresh or frozen cherries (pitted) – The star ingredient that brings a burst of fruity flavor to your bars; fresh is best when in season!
- 1/2 cup granulated sugar – Adds sweetness to the cherry filling, making it irresistibly delicious.
- 1 tablespoon cornstarch – Thickens the cherry filling so it holds together beautifully in every bite.
- 1 tablespoon lemon juice – Brightens up the filling with a touch of acidity, balancing out the sweetness of the cherries.
- 1/4 teaspoon vanilla extract – Enhances the overall flavor profile of your cherry pie bars for that comforting homemade touch.
How to Make cherry pie bars

1. Preheat the oven to 350°F (175°C). Greasing the baking pan now will ensure your cherry pie bars come out easily after baking, so don’t skip this step!
2. Combine flour, sugar, softened butter, and salt in a mixing bowl. Mix until crumbly; you’re looking for a sandy texture that’s perfect for our buttery crust.
3. Add the egg and mix until a dough forms. Press half of the dough into the bottom of your prepared pan, creating a solid base for those delicious cherry layers.
For the Cherry Filling:
4. Cook cherries with 1/2 cup granulated sugar, cornstarch, lemon juice, and vanilla in a saucepan over medium heat until thickened. This should take about 5-7 minutes; watch for that lovely bubbling!
5. Spread the luscious cherry filling evenly over your crust in the baking pan. The vibrant color will make your heart sing as it transforms into a beautiful dessert.
6. Crumble the remaining dough over the cherry filling. This topping is key to achieving that delightful crunch on top—don’t worry if it’s not perfect!
7. Bake in the preheated oven for 30 minutes or until golden brown. You’ll know it’s ready when your kitchen smells like sweet cherries!
8. Cool completely before cutting into bars. This step allows all those flavors to meld beautifully together—patience is worth it!
Optional: Serve warm with a scoop of vanilla ice cream for extra indulgence.
Exact quantities are listed in the recipe card below.
Expert Tips
- Butter Temperature: Use softened butter, not melted, for a crumbly texture in your cherry pie bars.
- Flour Measurement: Spoon and level your flour to avoid dense bars; too much flour can make the crust tough.
- Cherry Prep: If using fresh cherries, ensure they are pitted thoroughly; any remaining pits can ruin the experience.
- Cornstarch Importance: Don’t skip the cornstarch; it helps thicken the cherry filling and prevent soggy bars.
- Cooling Time: Allow your cherry pie bars to cool completely before cutting; this ensures clean slices and better texture.
How to Store and Freeze cherry pie bars
- Room Temperature: Keep your cherry pie bars in an airtight container at room temperature for up to 3 days to maintain their delightful texture.
- Fridge: For longer freshness, store the bars in the fridge for up to a week. Just be sure they’re wrapped well to prevent drying out.
- Freezer: To freeze, wrap individual bars tightly in plastic wrap and place them in a freezer-safe bag. They can last up to 3 months!
- Reheating: When you’re ready to enjoy, thaw at room temperature or warm them in the microwave for about 10–15 seconds for a cozy treat.
cherry pie bars Your Way
Feel free to unleash your creativity and customize these delightful treats to suit your taste buds!
- Gluten-Free: Substitute all-purpose flour with a gluten-free baking blend for a delicious alternative. The texture may vary slightly, but the flavor will still shine through.
- Vegan: Replace the butter with coconut oil and the egg with a flaxseed egg (1 tablespoon ground flaxseed + 2.5 tablespoons water). You’ll enjoy a rich, plant-based version that’s just as satisfying!
- Almond Flour: Using almond flour instead of all-purpose flour lends a nutty flavor and tender crumb. This variation pairs beautifully with the cherry filling, adding depth to every bite.
- Brown Sugar: Swap granulated sugar for brown sugar in both the crust and filling for a deeper caramel-like sweetness. This twist enhances the overall richness and complements the tart cherries perfectly.
- Spiced Filling: Add a pinch of cinnamon or nutmeg to the cherry filling for a warm, aromatic touch. These spices elevate the flavors and evoke cozy memories of baking during the holidays.
- Citrus Zest: Incorporate lemon or orange zest into both crust and filling for an invigorating burst of citrus freshness. It brightens up the dessert and adds an unexpected zing that pairs wonderfully with cherries.
- Chocolate Drizzle: After baking, drizzle melted chocolate over cooled bars for an indulgent finish. The combination of chocolate and cherries creates a decadent treat that’s hard to resist!
Make Ahead Options

Preparing cherry pie bars is a fantastic way to streamline your dessert game, especially when you can prep components in advance. You can easily prepare the crust and topping by mixing together 1 cup of all-purpose flour, 1/2 cup of granulated sugar, 1/2 cup of softened unsalted butter, 1/4 teaspoon of salt, and 1 large egg ahead of time. This dough can be refrigerated for up to 3 days before using. For the cherry filling, combine 2 cups of pitted fresh or frozen cherries, 1/2 cup of granulated sugar, 1 tablespoon of cornstarch, 1 tablespoon of lemon juice, and 1/4 teaspoon of vanilla extract in advance as well—this can sit in the fridge for up to 24 hours. When you’re ready to enjoy your cherry pie bars, simply preheat the oven to 350°F (175°C), grease your baking pan, press half the dough into the pan, layer on the cherry filling, crumble the remaining dough over it, and bake for about 30 minutes until golden brown. Allow them to cool before cutting into perfect squares for serving!
cherry pie bars Questions Answered
What type of cherries should I use for the filling?
You can use either fresh or frozen cherries for your cherry pie bars. If using fresh cherries, be sure to pit them first. Frozen cherries are a great option too—just allow them to thaw and drain any excess liquid before using, which will help keep your filling from becoming too watery.
Can I substitute the all-purpose flour in the crust?
Absolutely! If you’re looking for a gluten-free alternative, almond flour or a gluten-free flour blend can work well. Just keep in mind that the texture may vary slightly, so adjust the amount of butter as needed to maintain a crumbly consistency.
How should I store leftover cherry pie bars?
To keep your cherry pie bars fresh, store them in an airtight container at room temperature for up to 3 days. If you want to extend their shelf life, you can refrigerate them for up to a week. Just remember to let them come back to room temperature before enjoying!
Can I freeze these cherry pie bars?
Yes, you can freeze cherry pie bars! Once they are completely cooled, wrap them tightly in plastic wrap and then in aluminum foil or place them in an airtight freezer bag. They can be stored in the freezer for up to 3 months. When ready to eat, thaw them overnight in the refrigerator and enjoy!
What if my cherry filling is too runny?
If your cherry filling turns out runny, don’t worry! You can thicken it by cooking it a little longer on the stove until it reaches your desired consistency. Alternatively, adding a bit more cornstarch (1/2 tablespoon at a time) while cooking will help absorb excess liquid and create that perfect thick filling.
How many servings does this recipe yield?
This recipe makes about 4 generous servings of delicious cherry pie bars. Each serving contains approximately 250 calories, making it a delightful treat without going overboard! Feel free to double or triple the recipe if you’re hosting friends or family—they’re sure to be a hit!
Cherry Pie Bars
Ingredients
Method
- Preheat the oven to 350°F (175°C). Grease the baking pan.
- In a mixing bowl, combine flour, sugar, butter, and salt. Mix until crumbly.
- Add the egg and mix until a dough forms. Press half of the dough into the bottom of the prepared pan.
- In a saucepan, combine cherries, sugar, cornstarch, lemon juice, and vanilla. Cook over medium heat until thickened.
- Spread the cherry filling over the crust in the baking pan.
- Crumble the remaining dough over the cherry filling.
- Bake in the preheated oven for 30 minutes or until golden brown.
- Allow to cool before cutting into bars.