
Crispy Air Fryer Zucchini Fries Recipe for a Healthy Snack Delight
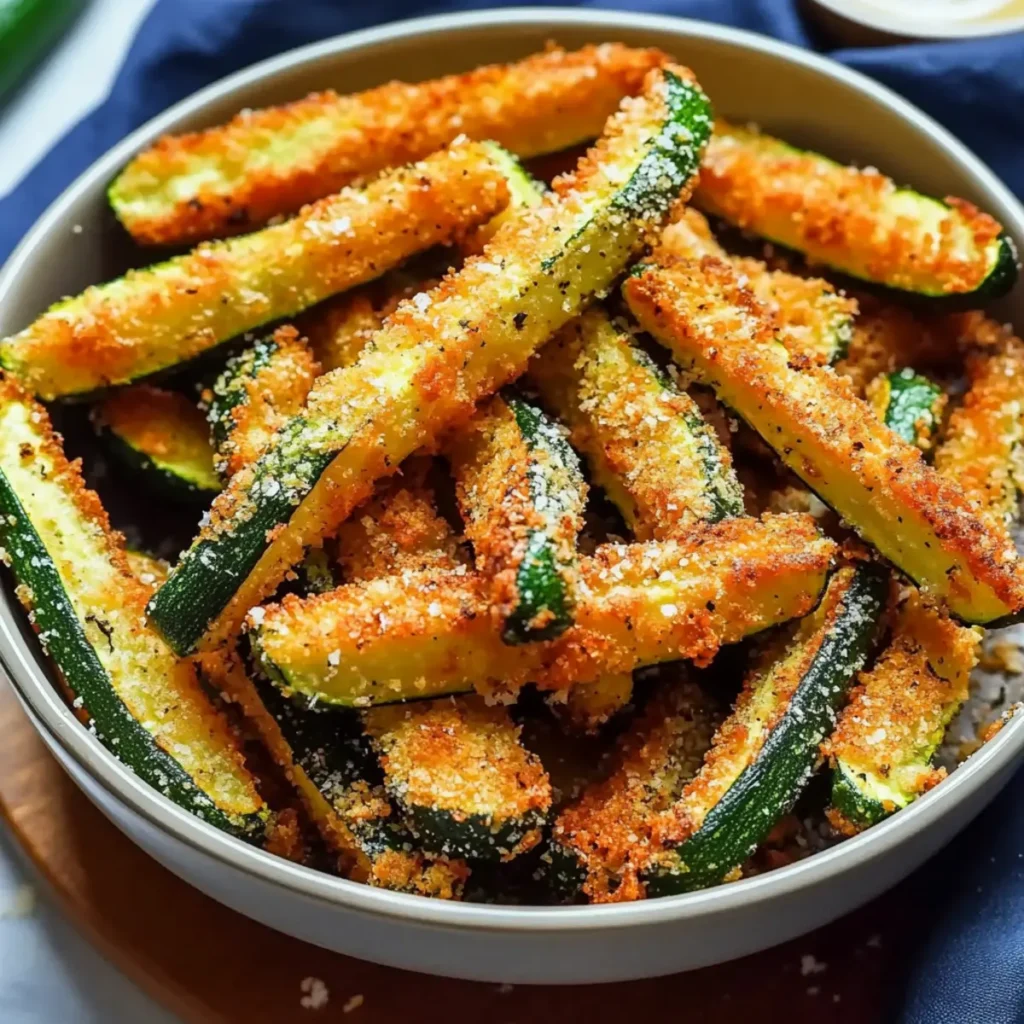
Crispy on the outside, tender on the inside—Crispy Air Fryer Zucchini Fries Recipe for a Healthy Snack brings the best of both worlds right to your kitchen table! If you’ve ever thought of zucchini as a bland, watery veggie, get ready to have your mind blown. Imagine biting into a crunchy, cheesy delight that packs all the flavor without the guilt of traditional fries. The aroma wafting through your house will have your family racing to the kitchen. Everything about these zucchini fries is a win. Whether you’re using them as game day snacks, a light appetizer at a dinner party, or just a healthy nibble while binge-watching your favorite shows, this recipe is not just food—it’s an experience. With the simple step of tossing zucchini in a crunchy coating of panko and Parmesan cheese, you’ll have a dish so irresistible that even the toughest veggie skeptics will be coming back for more. Ingredients for Crispy Air Fryer Zucchini Fries Recipe for a Healthy Snack Here’s what you’ll need to make this delicious Crispy Air Fryer Zucchini Fries Recipe for a Healthy Snack: 3 small zucchini – Choose firm, youthful zucchinis for a tender crunch. Larger zucchinis can be too watery. 1 cup panko crumbs – These Japanese-style breadcrumbs provide an extra crunch compared to regular bread crumbs. 1/2 cup grated parmesan cheese – Opt for fresh, finely grated Parmesan to enhance the flavor and texture. 2 Tbsp Italian seasoning – A blend of herbs that adds an aromatic touch; feel free to adjust based on your taste. 1 teaspoon garlic powder – For that irresistible garlicky goodness, enhancing the savory profile of the fries. 1/2 teaspoon salt – This simple seasoning helps to enhance all the delicious flavors. 1/2 cup flour – All-purpose flour works best here for an easy, sturdy coating. 2 large eggs – These will help bind the coating and create that crispy outer layer. 1 Tbsp water – Mixing this with the eggs ensures a smoother coating for your zucchini fries. How to Make Crispy Air Fryer Zucchini Fries Recipe for a Healthy Snack Follow these simple steps to prepare this delicious Crispy Air Fryer Zucchini Fries Recipe for a Healthy Snack: Step 1: Prepare the Zucchini Begin by washing the zucchinis thoroughly and cutting them into fry-shaped pieces. Aim for about ½ inch thick so the insides cook perfectly while the outsides become crisp. Step 2: Set Up Your Breading Station In a shallow dish, pour your flour and season it lightly with salt, ensuring every fry is properly coated. In another bowl, whisk together the eggs and water until well combined. Finally, in a third bowl, mix your panko crumbs, Parmesan cheese, Italian seasoning, and garlic powder. Step 3: Coating the Zucchini Fries Take a zucchini piece, dip it into the flour first, shaking off the excess. Next, immerse it in the egg mixture, allowing any drips to fall back into the bowl. Lastly, roll it in the panko mixture, making sure it’s fully covered and looks as crispy as can be! Step 4: Preheat the Air Fryer Set your air fryer to 400°F (200°C) and preheat for about 5 minutes. This ensures your zucchini fries will start cooking immediately, preserving that crunch we love so much. Step 5: Air Fry Your Fries Arrange the coated zucchini fries in a single layer in the air fryer basket—leave some space between them for air circulation. Depending on the size of your air fryer, you may need to work in batches. Cook for approximately 12 minutes or until they turn a beautiful golden brown. Step 6: Serve and Enjoy Once they are perfectly crispy, remove them from the air fryer and let them cool for a minute. Serve hot with your favorite dipping sauce for that next-level snacking experience. Whether you’re indulging during a weekend movie night or looking for a healthy side dish, these crispy air fryer zucchini fries will steal the show! Enjoy the satisfying crunch with the knowledge that you’re choosing a smart, nutritious option. Remember, these zucchini fries hold a special place in my heart—and hopefully in yours now too. As the aroma fills the air and the flavors dance on your taste buds, you’ll definitely understand why this recipe is a family favorite! Perfecting Crispy Air Fryer Zucchini Fries Recipe for a Healthy Snack Cooking Process Start by preheating your air fryer to 400°F, setting the stage for crispy perfection. While it warms up, chop your zucchini and prepare your coatings. This multitasking strategy will have your fries ready to devour in no time, ensuring maximum flavor and crunch. Add Your Touch to Crispy Air Fryer Zucchini Fries Recipe for a Healthy Snack Feel free to switch things up with breadcrumbs or seasoning blends that tickle your taste buds. For a spicy twist, sprinkle in a dash of cayenne or your favorite hot sauce, or experiment with a hint of smoked paprika for a unique flavor profile. Storing & Reheating Crispy Air Fryer Zucchini Fries Recipe for a Healthy Snack Store your zucchini fries in an airtight container in the fridge for up to three days. To reheat, pop them back in the air fryer at 350°F for about 5 minutes until they regain that amazing crunch. On a rainy Saturday, I made these zucchini fries for family movie night. Everyone raved about them, and my cousin even declared them better than traditional French fries. Now, they’re a weekend staple! FAQs About Crispy Air Fryer Zucchini Fries Recipe for a Healthy Snack What is Crispy Air Fryer Zucchini Fries Recipe for a Healthy Snack? The Crispy Air Fryer Zucchini Fries Recipe for a Healthy Snack transforms humble zucchini into a deliciously crispy treat. By combining panko crumbs, parmesan cheese, and flavorful seasonings, you achieve a delightful crunch without the excess oil of traditional frying. This recipe is not only simple but also a healthy alternative for your snacking needs, making it the perfect addition to family gatherings or movie
Delicious Gourmet Blue Cheese Coleslaw Recipe Perfect for Any Occasion
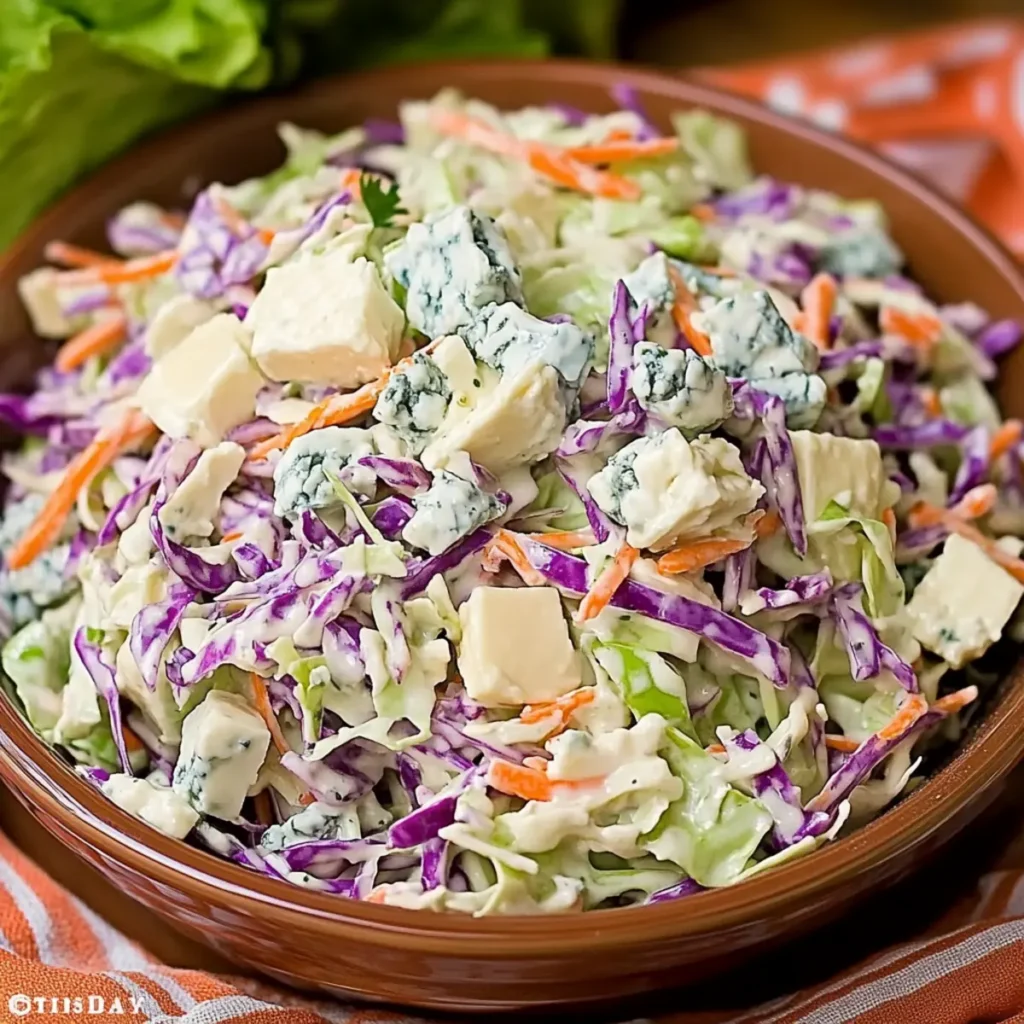
There’s something about the crunch of cabbage mingling with the rich, tangy goodness of blue cheese that makes my taste buds dance with joy. Imagine biting into a bowl of Gourmet Blue Cheese Coleslaw, where vibrant green and red cabbage come together in a deliciously creamy embrace, providing a symphony of textures and flavors. This delightful dish isn’t just a side; it’s a show-stopper, ready to elevate your picnics, barbecues, or family dinners to gourmet status. The first time I tried a coleslaw with blue cheese, I was skeptical. I thought, “How could a salad be so splendid?” But one crisp bite later, I was a convert. Not only does this Gourmet Blue Cheese Coleslaw tantalize your palate, but it also impacts your imagination with its beautiful colors and enticing aroma. Whether you’re hosting a casual backyard barbecue or a fancy dinner party, this coleslaw adds a burst of flavor that makes any occasion special. Ingredients for Delicious Gourmet Blue Cheese Coleslaw Recipe for Any Occasion Here’s what you’ll need to make this delicious Delicious Gourmet Blue Cheese Coleslaw Recipe for Any Occasion: 4 cups shredded green cabbage – Look for fresh, vibrant cabbage for the best crunch. You can also use pre-shredded cabbage for ease. 2 cups shredded red cabbage – This adds beautiful color and a slightly sweeter taste compared to green cabbage. 1 cup grated carrots – Freshly grated adds sweetness and a pop of color, but pre-grated works just as well. 1 cup mayonnaise – This creamy base binds everything together. Use your favorite brand for the best flavor. 3 tablespoons white wine vinegar – It adds a nice tang to balance the richness of the mayonnaise. 1 tablespoon extra-virgin olive oil – This enhances the dressing and adds depth of flavor. 2 tablespoons granulated sugar – This sweetens the dressing and balances the tangy ingredients. 1 teaspoon poppy seeds – These tiny seeds add a delightful crunch and a hint of nuttiness. 1 teaspoon celery salt – A great seasoning that enhances the overall flavor and complements the cabbage. 1/4 teaspoon white pepper – This adds a subtle kick without overpowering the dish. 1/2 teaspoon dry mustard powder – This gives an extra layer of flavor, rounding out the dressing beautifully. 8 ounces crumbled blue cheese – The star of the show! Choose a quality blue cheese for the best results. How to Make Delicious Gourmet Blue Cheese Coleslaw Recipe for Any Occasion Follow these simple steps to prepare this delicious Delicious Gourmet Blue Cheese Coleslaw Recipe for Any Occasion: Step 1: Prepare the Vegetables In a large bowl, combine the shredded green cabbage, shredded red cabbage, and grated carrots. Mix them together until they’re beautifully intertwined, like a harmonious dance party in a bowl. Step 2: Whisk the Dressing In a separate bowl, whisk together the mayonnaise, white wine vinegar, extra-virgin olive oil, granulated sugar, poppy seeds, celery salt, white pepper, and dry mustard powder until smooth. This creamy concoction is what dreams are made of. Step 3: Combine the Dressing with the Veggies Pour the dressing over the cabbage and carrot mixture. Toss it all together gently, ensuring every piece of cabbage and carrot gets to wear a lovely coat of the dressing. Step 4: Fold in the Blue Cheese Gently fold in the crumbled blue cheese, allowing it to mix through the coleslaw without breaking down too much. You want those cheesy lovelies to remain intact for added punch. Step 5: Let It Chill Serve immediately if you’re eager, or let it chill in the refrigerator for about 30 minutes to an hour. This resting period allows all those fantastic flavors to meld together, making each bite even more enjoyable. Step 6: Serve with a Smile When you’re ready to dig in, transfer the coleslaw to a beautiful serving dish. This refreshing and zesty coleslaw pairs well with grilled meats, sandwiches, or simply as a standalone delight. Now that you’ve mastered this Gourmet Blue Cheese Coleslaw recipe, you can confidently bring this twist on a classic dish to any gathering. Just imagine your friends’ faces as they dive in, completely surprised by the rich, creamy flavors and the delightful crunch. Who knew a humble coleslaw could be so glamorous? Enjoy your culinary adventure with this unforgettable gourmet recipe. This showstopping Delicious Gourmet Blue Cheese Coleslaw Recipe for Any Occasion delivers restaurant-quality results using simple ingredients you probably already have at home. The perfect balance of textures and flavors creates an unforgettable dining experience that will have everyone asking for seconds. Picture-perfect presentation with vibrant colors makes this dish absolutely Instagram-worthy and guaranteed to impress any dinner guest. Incredibly versatile recipe that works beautifully for weeknight dinners, meal prep, special occasions, or even outdoor entertaining sessions. Perfecting Delicious Gourmet Blue Cheese Coleslaw Recipe for Any Occasion Cooking Process Start by prepping your veggies first; this way, you can seamlessly combine them with the dressing. Whisk the dressing ingredients while the greens await their flavorful partner. Mixing everything at once is a recipe for chaos, and we want harmony! Add Your Touch to Delicious Gourmet Blue Cheese Coleslaw Recipe for Any Occasion Feel free to swap in your favorite shredded vegetables like broccoli or radishes for a unique twist. Adding diced apples or raisins can introduce a sweet component, balancing the blue cheese’s richness. The possibilities are endless, making this a truly customizable dish! Storing & Reheating Delicious Gourmet Blue Cheese Coleslaw Recipe for Any Occasion Store any leftover coleslaw in an airtight container in the fridge. For best flavor and texture, consume it within two days. Reheat is not recommended, as the freshness and crunch of the ingredients shine best when cold. The first time I made this coleslaw for a family picnic, my aunt declared it the best she’d ever had. I swear she was going to throw a parade just to celebrate my culinary triumph! FAQs About Delicious Gourmet Blue Cheese Coleslaw Recipe for Any Occasion What is Delicious Gourmet
Crispy Air Fryer Parmesan Green Beans Ready in Just 15 Minutes
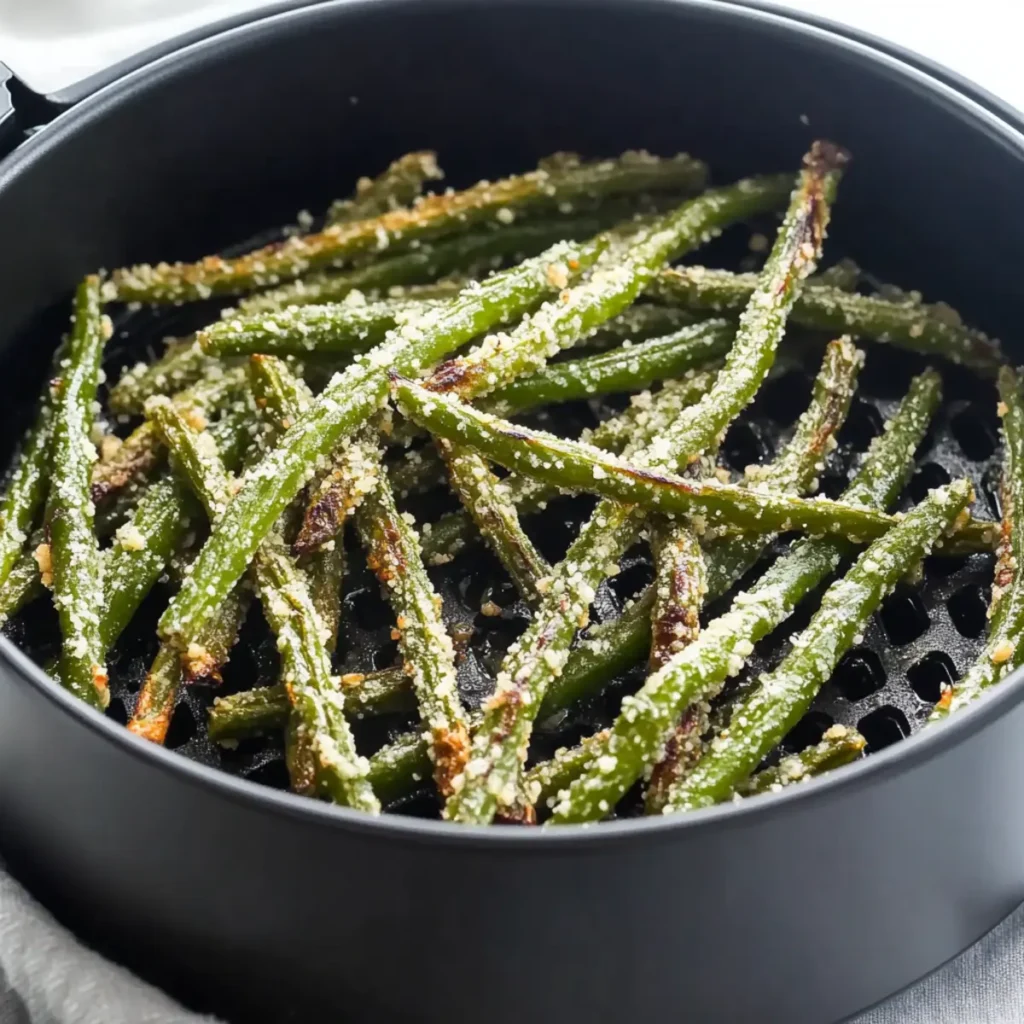
There’s something utterly delightful about crispy air fryer Parmesan green beans that tickles the taste buds. Imagine a crispy, golden-brown exterior giving way to tender, flavorful green beans that burst with a hint of garlic and tangy lemon. Yes, those are the *Crispy Air Fryer Parmesan Green Beans Ready in Just 15 Minutes* you never knew you needed in your life. Whether you’re looking for the perfect side dish to elevate a weeknight dinner or a snack to munch on while binge-watching your favorite series, these green beans are the answer. Their vibrant color and tantalizing aroma make them just as amazing to look at as they are to eat. Let’s get excited about flavor and texture, all in less time than your favorite sitcom’s commercial break! Ingredients for Crispy Air Fryer Parmesan Green Beans Ready in Just 15 Minutes Here’s what you’ll need to make this delicious Crispy Air Fryer Parmesan Green Beans Ready in Just 15 Minutes: 1 pound green beans – Look for bright, crisp beans that snap when broken; fresh is always best for flavor and texture. 2 tablespoons olive oil – A dash of good-quality olive oil gives the beans a rich flavor and helps the parmesan stick. 2 tablespoons lemon juice – Freshly squeezed lemon juice adds brightness and balances the richness of the cheese. 1/4 cup grated parmesan – Using freshly grated cheese will enhance the flavor and ensure that it melts beautifully. 1 teaspoon garlic powder – Garlic powder brings a savory depth that complements the other ingredients perfectly. 1/2 teaspoon salt – Just enough to elevate the flavors; add more if you prefer. 1/4 teaspoon pepper – Freshly cracked black pepper adds a delightful kick to round out the dish. How to Make Crispy Air Fryer Parmesan Green Beans Ready in Just 15 Minutes Follow these simple steps to prepare this delicious Crispy Air Fryer Parmesan Green Beans Ready in Just 15 Minutes: Step 1: Prepare the Green Beans Start by rinsing and trimming the ends off the green beans. Feel free to snap off the ends; it can be surprisingly satisfying, like a mini therapy session! Step 2: Mix the Ingredients In a large bowl, combine the green beans, olive oil, lemon juice, grated parmesan, garlic powder, salt, and pepper. Toss everything together until the beans are well-coated. Channel your inner chef and use your hands. It’s messier but also way more fun! Step 3: Preheat the Air Fryer Preheat your air fryer to 370°F (185°C). This is essential for crispiness! You want those delicious green beans to have a warm welcome when they enter the fryer. Step 4: Air Fry the Green Beans Place the seasoned green beans in the air fryer basket in a single layer. Cook for 5 minutes, then shake the basket to ensure all the beans get equal love. Air fry for another 5 minutes or until the beans are golden and tender. Step 5: Serve and Enjoy Transfer the crispy green beans to a serving platter, and sprinkle a little extra parmesan on top if you’re feeling indulgent. Serve them immediately while they’re still hot for the best flavor and crunch. These Crispy Air Fryer Parmesan Green Beans are not just a side dish; they’re a conversation starter. Picture friends gathering around, taking that first bite, and the delightful crunch echoing in the room followed by enthusiastic “mmms.” It’s moments like these that add joy to everyday life. Enjoy this scrumptious dish as part of a fabulous family dinner, or mix it up at gatherings with friends—your green bean game is about to be elevated. In less time than you can say “snack attack,” you’re getting ready to impress with a dish that’s got both flair and flavor. Happy cooking! Perfecting Crispy Air Fryer Parmesan Green Beans Ready in Just 15 Minutes Cooking Process To achieve the crispiest green beans, start by tossing the fresh beans with olive oil and seasonings. Preheat your air fryer while you prepare the mixture, maximizing efficiency for perfect results and making sure those flavor-packed beans are cooking as you whisk everything together. Add Your Touch to Crispy Air Fryer Parmesan Green Beans Ready in Just 15 Minutes Feel free to play around with seasonings! Swap out the garlic powder for onion powder or add a pinch of red pepper flakes for a spicy kick. You could also sprinkle in some lemon zest for an extra citrusy twist! Storing & Reheating Crispy Air Fryer Parmesan Green Beans Ready in Just 15 Minutes To store leftovers, place them in an airtight container in the refrigerator for up to three days. For reheating, air fry for a few minutes to regain their crispy goodness without compromising flavor or texture. Sometimes I whip up these crispy green beans as a side dish for gatherings, and the laughter and compliments that follow always warm my heart. They’ve been the highlight of many dinners, and I love how everyone comes back for more! FAQs About Crispy Air Fryer Parmesan Green Beans Ready in Just 15 Minutes What is Crispy Air Fryer Parmesan Green Beans Ready in Just 15 Minutes? Crispy Air Fryer Parmesan Green Beans Ready in Just 15 Minutes is a delightful and quick side dish that combines fresh green beans with olive oil, lemon juice, and parmesan. Cooked in an air fryer, these green beans come out perfectly crispy and flavorful in no time. This recipe not only enhances the natural crunch of the green beans but also elevates them with a savory twist that impresses any dinner guest. It’s ideal for busy weeknights or even festive occasions when you want a delicious and healthy side dish without a fuss. How do I prepare Crispy Air Fryer Parmesan Green Beans Ready in Just 15 Minutes? To prepare this dish, start by washing and trimming one pound of green beans. Toss them in a bowl with two tablespoons of olive oil, two tablespoons of lemon juice, a quarter cup of grated parmesan,
Easy No-Bake Protein Balls Recipe for Healthy Snacking
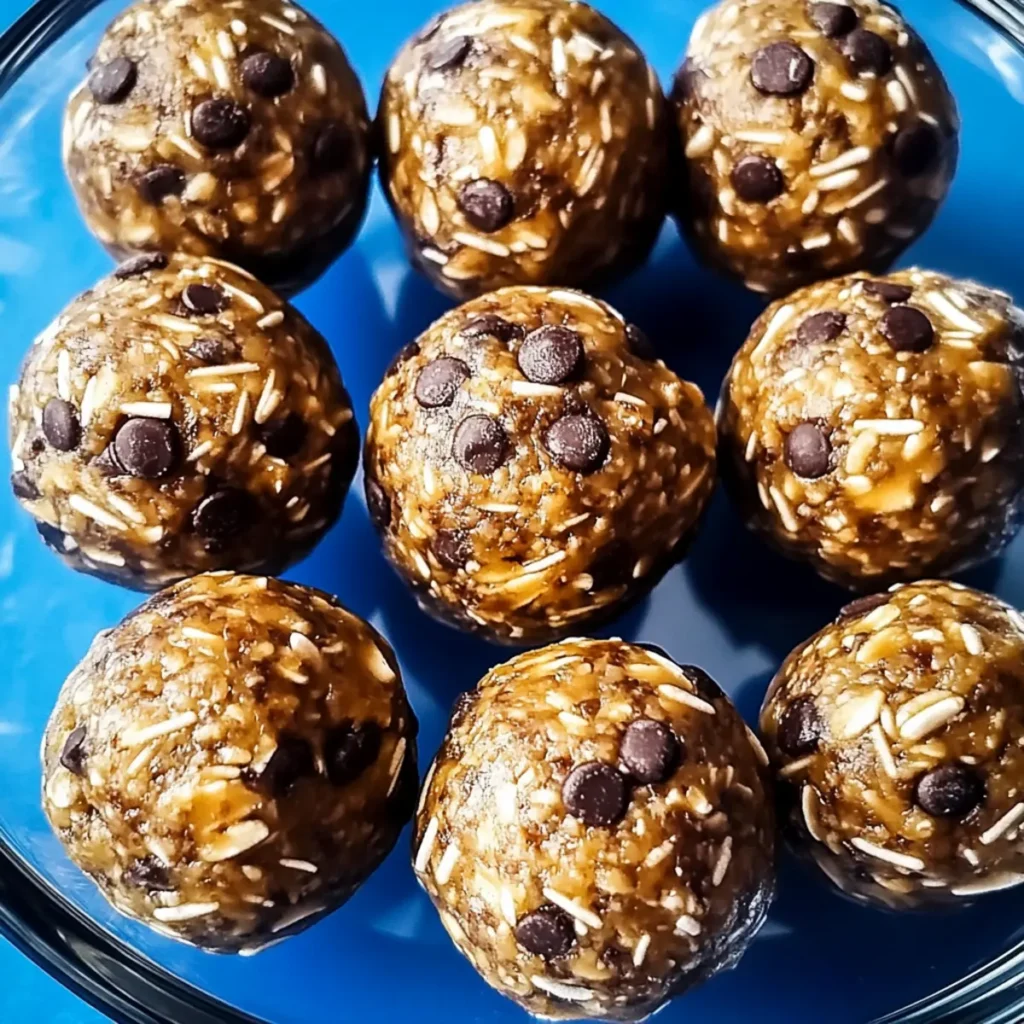
The delightful experience of biting into a No-Bake Protein Ball is like finding a treasure trove of flavor, texture, and nutrition all wrapped up in a simple little bite-sized package. Each ball is a crunchy, creamy, and slightly sweet morsel that promises to satiate your cravings while providing a healthy punch of protein. It’s the snacking solution you didn’t know you needed—perfect for a post-workout boost or an afternoon pick-me-up. With a delightful combination of whole rolled oats and creamy peanut butter, this recipe entices with its sweet aroma and satisfying texture. You can whip up a batch in just 10 minutes, and before you know it, they’ll be chilling in your fridge, ready to fuel your day. Picture this: it’s a hectic afternoon, and your stomach starts grumbling. You reach for one of these little delights and, in a single bite, you’re greeted with a fantastic blend of chocolate chips and nutty goodness. Talk about a game-changer for your snacking routine! Ingredients for No-Bake Protein Balls Here’s what you’ll need to make this delicious No-Bake Protein Balls: 1.5 cups whole rolled oats – The base of our protein balls for thickness, chew, and fiber; ensure they’re the old-fashioned, not instant variety for the right texture. 1 cup creamy natural peanut butter – A protein-packed delight that binds the mixture together; opt for unsweetened versions for a healthier option. 0.25 cups ground flaxseed – Adds a nutty flavor while offering omega-3 fatty acids; you can substitute with chia seeds if needed. 0.25 cups honey – Acts as a natural sweetener and binder; maple syrup is a great alternative for a vegan-friendly version. 2 scoops protein powder (approximately 0.25 cups) – Boosts the protein content; choose your favorite flavor for a personalized spin. 1 teaspoon vanilla extract – Enhances the sweetness and flavor profile; pure vanilla extract is always the way to go for a richer taste. 6 tablespoons mini chocolate chips – Because who can resist chocolate? Choose dark chocolate for a healthier sweet touch. How to Make No-Bake Protein Balls Follow these simple steps to prepare this delicious No-Bake Protein Balls: Step 1: Gather Your Ingredients Start by assembling all your ingredients, making sure your oats, peanut butter, honey, and protein powder are at room temperature for easy mixing. Step 2: Mix the Dry Ingredients In a large bowl, combine the whole rolled oats, ground flaxseed, and protein powder. Use a wooden spoon to stir until well blended and there are no clumps. Step 3: Add the Wet Ingredients Pour in the creamy peanut butter, honey, and vanilla extract. Mix these wet and dry ingredients together. You might have to use your hands eventually; don’t worry, it’s totally worth it. Step 4: Fold in the Chocolate Chips Once the mixture is combined, gently fold in those delightful mini chocolate chips. They’re like hidden treasures in each ball just waiting to be discovered. Step 5: Shape into Balls Using a 2-tablespoon cookie scoop, portion out the mixture and then roll it into balls using your hands. Don’t worry if they aren’t perfectly round; the taste will make up for any imperfections. Step 6: Chill and Store Transfer the balls to a container lined with parchment paper. Chill them in the fridge for 1 to 2 hours until firm. These No-Bake Protein Balls can keep well in the fridge for up to a week or freeze well for later enjoyment. Once you have your No-Bake Protein Balls ready, grab a couple and set them aside for your next adventure. Whether you’re conquering a busy day at work, gearing up for an intense workout, or indulging in a guilt-free sweet treat during a binge-watch session, these protein balls are bound to be your newfound best friend. So what are you waiting for? Get to mixing and enjoy the delightful taste of healthy snacking! This showstopping No-Bake Protein Balls delivers restaurant-quality results using simple ingredients you probably already have at home. The perfect balance of textures and flavors creates an unforgettable dining experience that will have everyone asking for seconds. Picture-perfect presentation with vibrant colors makes this dish absolutely Instagram-worthy and guaranteed to impress any dinner guest. Incredibly versatile recipe that works beautifully for weeknight dinners, meal prep, special occasions, or even outdoor entertaining sessions. Perfecting No-Bake Protein Balls Cooking Process First, gather all ingredients and mix the dry ones together before incorporating the wet ingredients. This will ensure an even blend throughout the mixture. After combining everything, roll your protein balls quickly before chilling them in the fridge for the best texture. Add Your Touch to No-Bake Protein Balls Feel free to swap peanut butter with almond butter or sunflower seed butter for a nut-free option. You can also add dried fruit like cranberries or apricots, or consider using different flavored protein powder to personalize your energy bites to your taste! Storing & Reheating No-Bake Protein Balls Store your No-Bake Protein Balls in an airtight container in the fridge for up to a week. You can also freeze them for up to three months. Enjoy them straight from the freezer for a deliciously cold treat! I recall the first time I made No-Bake Protein Balls for a gathering. My friends devoured them, and one even exclaimed they were better than her favorite store-bought kind. That moment confirmed my kitchen prowess! FAQs About No-Bake Protein Balls What are No-Bake Protein Balls? No-Bake Protein Balls are delicious bite-sized snacks that combine wholesome ingredients like oats, nut butter, and protein powder, requiring no baking at all. These nutrient-packed treats are perfect for those seeking quick, healthy snacking options. Just mix the ingredients, roll them into balls, and you’re ready to enjoy a protein boost on the go. They suit various dietary preferences and can be customized with different flavors, making them a versatile option for everyone. How do you store No-Bake Protein Balls? To keep your No-Bake Protein Balls fresh and delicious, store them in an airtight container in the refrigerator. They can last
Easy Air Fryer Pizza Rolls Recipe Ready in Just 15 Minutes

When it comes to comfort food, few things can compete with the delightfully gooey and cheerful experience of biting into a crispy pizza roll. These Easy Air Fryer Pizza Rolls Recipe Ready in Just 15 Minutes promise to bring the joy of homemade pizza in a fun, bite-sized format that’s perfect for dipping and sharing. Imagine the aroma of warm cheese mingling with zesty pizza sauce wafting through your kitchen, making it nearly impossible to resist snacking before they’re even done cooking. Every time I make these little bundles of joy, I’m reminded of a rainy afternoon spent watching movies with friends, all of us huddled around a plateful of these crispy wonders. Whether it’s for a game day snack, a chilled-out movie night, or just because you feel like treating yourself, these pizza rolls are bound to become your new go-to recipe. You won’t believe how simple and quick they are, making them a fabulous option for any occasion. Ingredients for Easy Air Fryer Pizza Rolls Recipe Ready in Just 15 Minutes Here’s what you’ll need to make this delicious Easy Air Fryer Pizza Rolls Recipe Ready in Just 15 Minutes: 1 3/4 cups self-rising flour – This will create a delicious, soft dough with a lovely rise. If you’re out, all-purpose flour mixed with a bit of baking powder will work fine too. 1 cup Greek yogurt – This adds a tangy flavor and creamy texture to the dough, making it super easy to work with. You can use plain yogurt if that’s what you have on hand. 1/2 cup pizza sauce – Choose your favorite pizza sauce for a personalized flavor. You can even use marinara or pesto if you’re feeling adventurous! 1 cup mozzarella cheese, shredded – Nothing says pizza like gooey mozzarella! Feel free to mix it up with other cheeses like cheddar or pepper jack for a flavor kick. How to Make Easy Air Fryer Pizza Rolls Recipe Ready in Just 15 Minutes Follow these simple steps to prepare this delicious Easy Air Fryer Pizza Rolls Recipe Ready in Just 15 Minutes: Step 1: Create the Dough In a mixing bowl, combine the self-rising flour with Greek yogurt. Mix until a sticky dough forms. You might need to get your hands in there and knead it a little, just until the dough is smooth and well-combined. Step 2: Roll Out and Cut Lightly flour your work surface to prevent sticking. Roll out the dough to about 1/4 inch thick. Using a knife or pizza cutter, slice the dough into squares, roughly 3-4 inches wide. Step 3: Fill the Squares On each square, add a small dollop of pizza sauce and a sprinkling of shredded mozzarella cheese. Don’t overstuff—no one likes a production mess when all you want is a tasty treat! Step 4: Roll and Seal Fold each square into a roll, ensuring you pinch the edges tightly to enclose the fillings. This is where those pizza dreams come to life, and you might even do a little happy dance as you work. Step 5: Prepare the Air Fryer Preheat your air fryer to 370°F (185°C). This step is crucial for an even golden brown and crispy finish. Your air fryer might get a little hot and noisy, but that’s just it working its magic! Step 6: Air Fry the Rolls Place the rolls in the air fryer basket, making sure not to overcrowd them. Cook for about 10 minutes until they’re golden brown and the cheese inside is melty and gooey. The smell will be irresistible! Transfer the rolls to a cooling rack for a couple of minutes while they cool slightly. Enjoy them with extra dipping sauce for that authentic pizza experience at home. As you sink your teeth into the crispy outside and ooey-gooey inside, you’ll know every bite is a celebration of pizza goodness! These Easy Air Fryer Pizza Rolls are not just a quick snack; they’re perfect for any gathering and sure to impress. Happy cooking! You Must Know About Easy Air Fryer Pizza Rolls Recipe Ready in Just 15 Minutes This showstopping Easy Air Fryer Pizza Rolls Recipe Ready in Just 15 Minutes delivers restaurant-quality results using simple ingredients you probably already have at home. The perfect balance of textures and flavors creates an unforgettable dining experience that will have everyone asking for seconds. Picture-perfect presentation with vibrant colors makes this dish absolutely Instagram-worthy and guaranteed to impress any dinner guest. Incredibly versatile recipe that works beautifully for weeknight dinners, meal prep, special occasions, or even outdoor entertaining sessions. Perfecting Easy Air Fryer Pizza Rolls Recipe Ready in Just 15 Minutes Cooking Process Start by preparing your dough first, mixing flour and yogurt in a bowl. While the dough rests, preheat the air fryer to ensure crispy rolls. Once preheating is complete, assemble and cook the rolls in batches if necessary for optimal crispiness. Add Your Touch to Easy Air Fryer Pizza Rolls Recipe Ready in Just 15 Minutes Feel free to swap out the pizza sauce for pesto or alfredo for a different flavor profile. Add chopped veggies like bell peppers or even pepperoni for extra zest. Experimenting with cheese types, such as cheddar or gouda, can also elevate your pizza rolls. Storing & Reheating Easy Air Fryer Pizza Rolls Recipe Ready in Just 15 Minutes To store, keep the pizza rolls in an airtight container in the fridge for up to three days. For reheating, simply pop them back into the air fryer for a few minutes to regain that crispy texture—no soggy pizza rolls allowed! Sometimes, my friends would take one bite of these rolls and declare I should open a food truck. I still chuckle recalling their exaggerated reactions at our movie night when these made their grand debut! FAQs About Easy Air Fryer Pizza Rolls Recipe Ready in Just 15 Minutes What is Easy Air Fryer Pizza Rolls Recipe Ready in Just 15 Minutes? The Easy Air Fryer Pizza Rolls Recipe Ready
Crispy Air Fryer Smashed Potatoes Recipe with Rosemary and Garlic
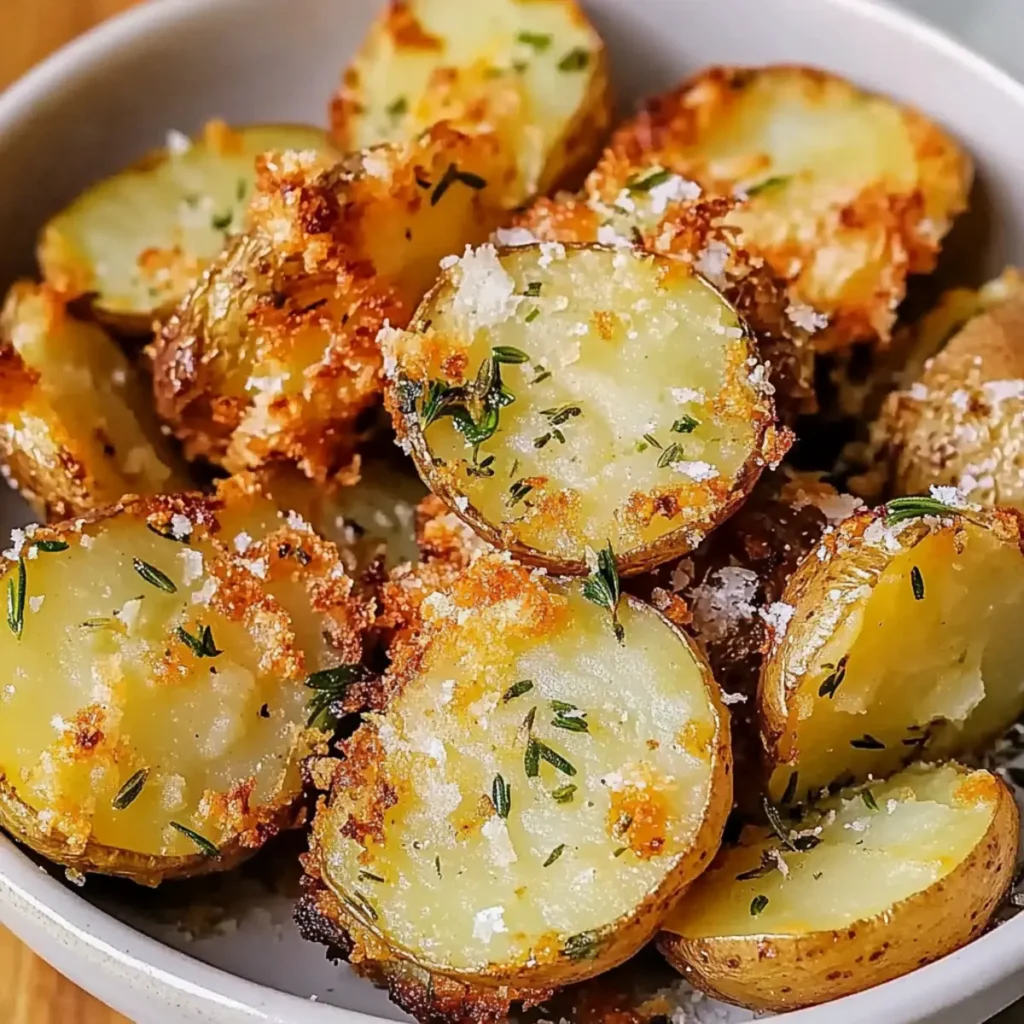
There’s something magical about the smell of crispy potatoes wafting through the air, especially when they are transformed into the delightful Crispy Air Fryer Smashed Potatoes Recipe with Rosemary and Garlic. Picture this: golden-brown, perfectly smashed potato rounds, each adorned with a drizzle of olive oil and a sprinkle of aromatic herbs. It’s the kind of dish that gets everyone’s attention and sparks joy at the dinner table. Imagine holding a tender smashed potato in one hand, feeling the warmth radiate, and knowing that a delightful crunch awaits with every bite. Whether you’re prepping for a family gathering, a cozy night in, or just want to indulge in some comfort food, these crispy gems will have your taste buds dancing. Get ready to dig into a plateful of deliciousness. Ingredients for Crispy Air Fryer Smashed Potatoes Recipe with Rosemary and Garlic Here’s what you’ll need to make this delicious Crispy Air Fryer Smashed Potatoes Recipe with Rosemary and Garlic: 1.5 lb Baby Gold Potatoes – These tender, creamy potatoes hold their shape beautifully and are perfect for smashing. 2 Tbsp Olive Oil – Use extra virgin olive oil for richness; it helps crisp the potatoes and adds amazing flavor. 1 tsp Dried Rosemary – This herb brings a delightful, fragrant note; fresh rosemary can be a savory substitute if you have it. 0.5 tsp Garlic Powder – A sprinkle of this adds a nice warmth. Feel free to substitute with fresh minced garlic for a punchier flavor. 0.25 tsp Black Pepper – Freshly cracked black pepper offers a peppery kick that elevates the dish. Kosher or Flake Salt – Salt to taste; it’s essential for enhancing all the flavors in your crispy potatoes. How to Make Crispy Air Fryer Smashed Potatoes Recipe with Rosemary and Garlic Follow these simple steps to prepare this delicious Crispy Air Fryer Smashed Potatoes Recipe with Rosemary and Garlic: Step 1: Prepare the Potatoes Wash and dry the baby gold potatoes thoroughly. Place them in your air fryer basket and set it to cook at 400°F (200°C) for 15-20 minutes. This step will cook them until they’re fork-tender and ready for smashing. Step 2: Smash the Potatoes Once the potatoes are done, gently transfer them to a sheet pan or cutting board. Using the bottom of a cup or mug, smash each potato into about 1/4-inch thickness. Remember, you’re aiming for a rustic look, so don’t crush them into oblivion or you might end up with mashed potatoes. Step 3: Add Seasoning Drizzle the smashed potatoes with olive oil, then sprinkle the dried rosemary, garlic powder, black pepper, and salt over them. Gently toss everything together to ensure the potatoes are evenly coated with those irresistible flavors. Step 4: Air Fry the Smashed Potatoes Again Place the seasoned smashed potatoes back into the air fryer basket. Cook them at 400°F (200°C) for an additional 15-20 minutes, shaking the basket halfway through. This crucial step is where they turn golden and crisp, so don’t rush it! Step 5: Serve and Enjoy Once they’re crispy, serve the potatoes immediately, garnished with a sprinkle of fresh herbs if you like. They make a fabulous side dish or a snack that your friends won’t stop talking about. Enjoying these crispy air fryer smashed potatoes drizzled with a touch of olive oil and a dash of rosemary and garlic is pure bliss. Grab your favorite dipping sauce, and you’re ready for a flavor explosion that will make any meal special. This showstopping Crispy Air Fryer Smashed Potatoes Recipe with Rosemary and Garlic delivers restaurant-quality results using simple ingredients you probably already have at home. The perfect balance of textures and flavors creates an unforgettable dining experience that will have everyone asking for seconds. Picture-perfect presentation with vibrant colors makes this dish absolutely Instagram-worthy and guaranteed to impress any dinner guest. Incredibly versatile recipe that works beautifully for weeknight dinners, meal prep, special occasions, or even outdoor entertaining sessions. Perfecting Crispy Air Fryer Smashed Potatoes Recipe with Rosemary and Garlic Cooking Process Start by cooking the potatoes until fork-tender. Smash them carefully, and then season thoroughly before air frying to achieve that unbeatable golden crisp. This sequence helps lock in flavors and improves texture. Add Your Touch to Crispy Air Fryer Smashed Potatoes Recipe with Rosemary and Garlic Feel free to swap out the rosemary with thyme or dill for a different flavor profile. Adding grated cheese or chopped bacon can elevate your smashed potatoes into a gourmet experience. Storing & Reheating Crispy Air Fryer Smashed Potatoes Recipe with Rosemary and Garlic Store any leftovers in an airtight container in the fridge for up to three days. Reheat in the air fryer for a few minutes to restore that crispy texture before serving again. Nothing warms my heart more than my friends’ happy faces after serving these crispy potatoes. The way they devour them, asking for the recipe, always reminds me why I love cooking. FAQs About Crispy Air Fryer Smashed Potatoes Recipe with Rosemary and Garlic What is Crispy Air Fryer Smashed Potatoes Recipe with Rosemary and Garlic? Crispy Air Fryer Smashed Potatoes Recipe with Rosemary and Garlic is a delightful dish that combines the creamy texture of baby gold potatoes with the mouthwatering flavors of rosemary and garlic. This recipe transforms simple ingredients into crispy, golden-brown potato coins using an air fryer. The combination of smashing the potatoes and air frying them gives you a perfect crunchy exterior while keeping the interior soft and tender. It’s an easy and impressive side dish that pairs beautifully with any main course. How do I store leftovers of the Crispy Air Fryer Smashed Potatoes? To store the leftovers of your Crispy Air Fryer Smashed Potatoes, place them in an airtight container and refrigerate them. They will keep well for up to three days. When you’re ready to enjoy them again, simply reheat them in the air fryer for a few minutes to regain their crispy texture. Avoid microwaving, as this may
Delicious Easy Air Fryer Fried Pickles Recipe in Just 15 Minutes
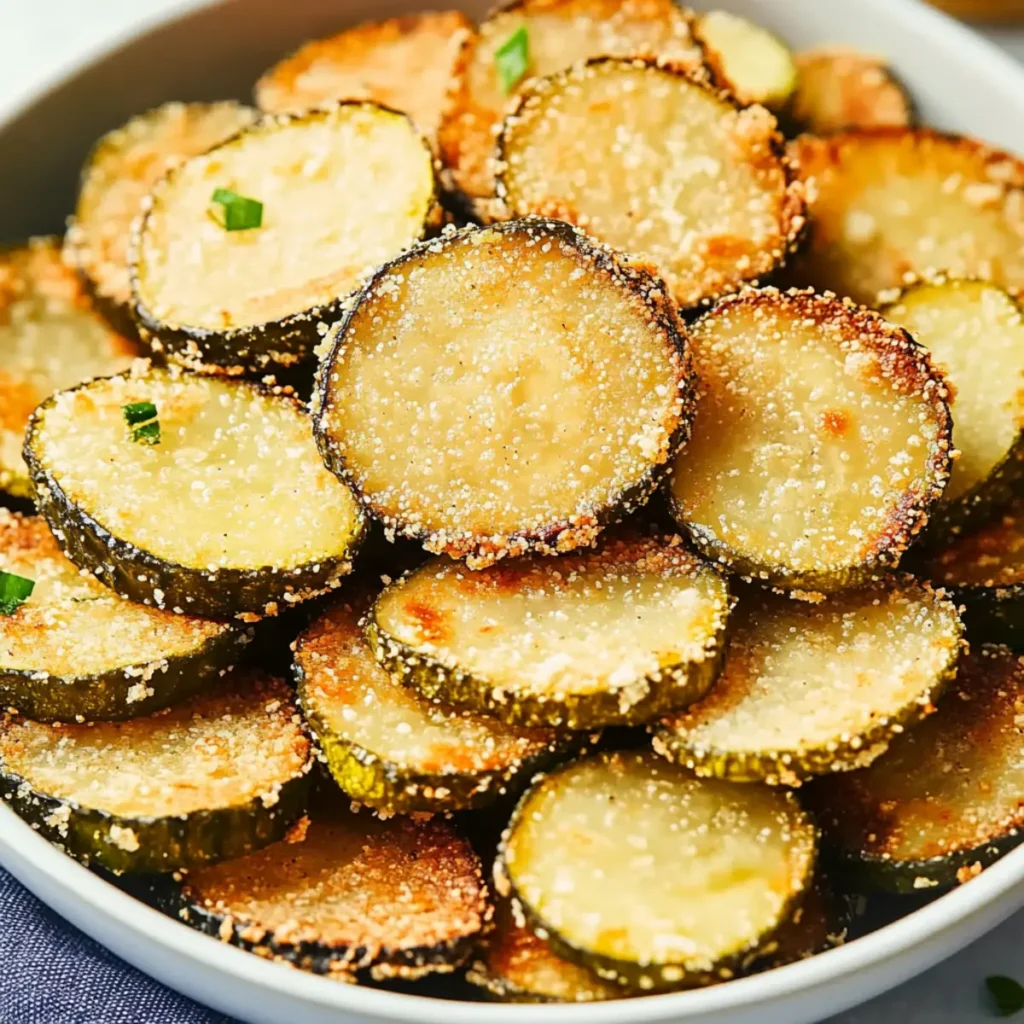
The mere thought of crispy, golden-brown fried pickles sizzling away in the air fryer can make your mouth water. Imagine biting into a crunchy, dill-infused slice, where tangy meets savory in the yummiest embrace. Yes, my friends, we’re about to embark on a journey with this delicious easy air fryer fried pickles recipe ready in 15 minutes that’s sure to bring joy to your taste buds and transform snack time into a flavor fiesta. Growing up, I always thought food magic happened only in restaurants. Little did I know that all it took was a bit of boldness and my trusty air fryer to whip up this incredible appetizer right at home. This recipe is perfect for those unexpected guest arrivals, game day snacking, or just a casual Friday night binge-watch with friends. Your family will wonder if you’ve got secret culinary powers once they taste these delightful treats! Ingredients for Delicious Easy Air Fryer Fried Pickles Recipe Ready in 15 Minutes Here’s what you’ll need to make this delicious Delicious Easy Air Fryer Fried Pickles Recipe Ready in 15 Minutes: 2 cups dill pickle slices – These provide the tangy and savory base of the dish. Opt for thicker slices for a satisfying crunch. 1/2 cup flour – This will be part of the batter, adding that necessary crunch factor. 1 large egg – This ingredient helps bind the batter to the pickles, ensuring that everything stays together during cooking. 1 Tablespoon water – Just a splash to thin out the batter slightly and make it easy to coat. 1/2 cup bread crumbs – These bring an extra crunchiness to the fried pickles, so choose panko for maximum crispiness. 1/4 cup grated Parmesan – This adds a savory depth and a bit of a cheesy flavor that elevates the entire dish. 1 Tablespoon Italian seasoning – A dash of this brings an aromatic flavor profile, enhancing the overall taste experience. How to Make Delicious Easy Air Fryer Fried Pickles Recipe Ready in 15 Minutes Follow these simple steps to prepare this delicious Delicious Easy Air Fryer Fried Pickles Recipe Ready in 15 Minutes: Step 1: Preheat Your Air Fryer Preheat the air fryer according to the manufacturer’s instructions. This typically means setting it to around 400°F (200°C). Don’t skip this step—it ensures your pickles cook evenly and get that perfect crisp. Step 2: Prepare the Batter In a mixing bowl, whisk together the flour, egg, and water until you have a smooth, thick batter. It should have a consistency that will cling to the pickles well, like a cozy blanket wrapping around them. Step 3: Coat the Pickles Dip each dill pickle slice into the batter, making sure it’s entirely coated. Shake off any excess batter to prevent clumps and ensure each slice cooks to golden perfection. Step 4: Make the Crunchy Coating In another bowl, mix together the bread crumbs, grated Parmesan, and Italian seasoning. This mixture will create that irresistible crunchy crust. Now roll each battered pickle slice in this breadcrumb mix until fully coated. Step 5: Air Fry the Pickles Place the coated pickle slices in a single layer in the air fryer basket. Cook them at 400°F (200°C) for about 10 minutes, flipping them halfway through for an even golden-brown result. You might want to set a timer; trust me, your kitchen will smell amazing! Step 6: Serve and Enjoy! When the air fryer timer goes off, remove the pickles and let them cool slightly before serving. Arrange them on a plate and, if you’re feeling extra fancy, serve them with a side of ranch dressing or spicy mayo for dipping. Whether you’re munching them during a casual movie night or presenting them as an exquisite appetizer at your next gathering, these delicious easy air fryer fried pickles are guaranteed to impress. Grab your favorite dip, sit back, and enjoy every single tasty bite! Perfecting Delicious Easy Air Fryer Fried Pickles Recipe Ready in 15 Minutes Cooking Process Start by preheating your air fryer, which is crucial for achieving that perfect crispy exterior. As it warms, whip up your batter and get the pickles coated and ready. Place them in a single layer to ensure even cooking. Add Your Touch to Delicious Easy Air Fryer Fried Pickles Recipe Ready in 15 Minutes Feel free to mix up the seasonings – a hint of cayenne or garlic powder could add extra zing. Try using crushed pork rinds instead of bread crumbs for a gluten-free twist or toss in a sprinkle of smoked paprika for a deeper flavor. Storing & Reheating Delicious Easy Air Fryer Fried Pickles Recipe Ready in 15 Minutes Store any leftovers in an airtight container in the refrigerator for up to three days. To reheat, pop them back in the air fryer at 375°F for a few minutes, restoring their crispy magic to perfection. Everyone has a favorite snack, and mine just might be these fried pickles. One evening, I surprised my friends with a batch and witnessed their delighted expressions as they crunched into the crispy goodness. It was an instant crowd-pleaser! FAQs About Delicious Easy Air Fryer Fried Pickles Recipe Ready in 15 Minutes What is Delicious Easy Air Fryer Fried Pickles Recipe Ready in 15 Minutes? The Delicious Easy Air Fryer Fried Pickles Recipe Ready in 15 Minutes is a quick, fun snack that transforms ordinary dill pickle slices into crispy, golden treats. With a simple batter and wonderfully seasoned bread crumbs, these fried pickles provide a delightful crunch with every bite. Perfect for parties, game nights, or just as a tasty treat, this recipe showcases the magic of the air fryer, allowing you to enjoy fried food without the guilt of traditional frying methods. How do I store leftovers of Delicious Easy Air Fryer Fried Pickles? To store leftovers from the Delicious Easy Air Fryer Fried Pickles Recipe Ready in 15 Minutes, place them in an airtight container and keep them in the refrigerator. They will stay fresh
Crispy Parmesan Salmon Bites with Creamy Garlic Sauce Recipe
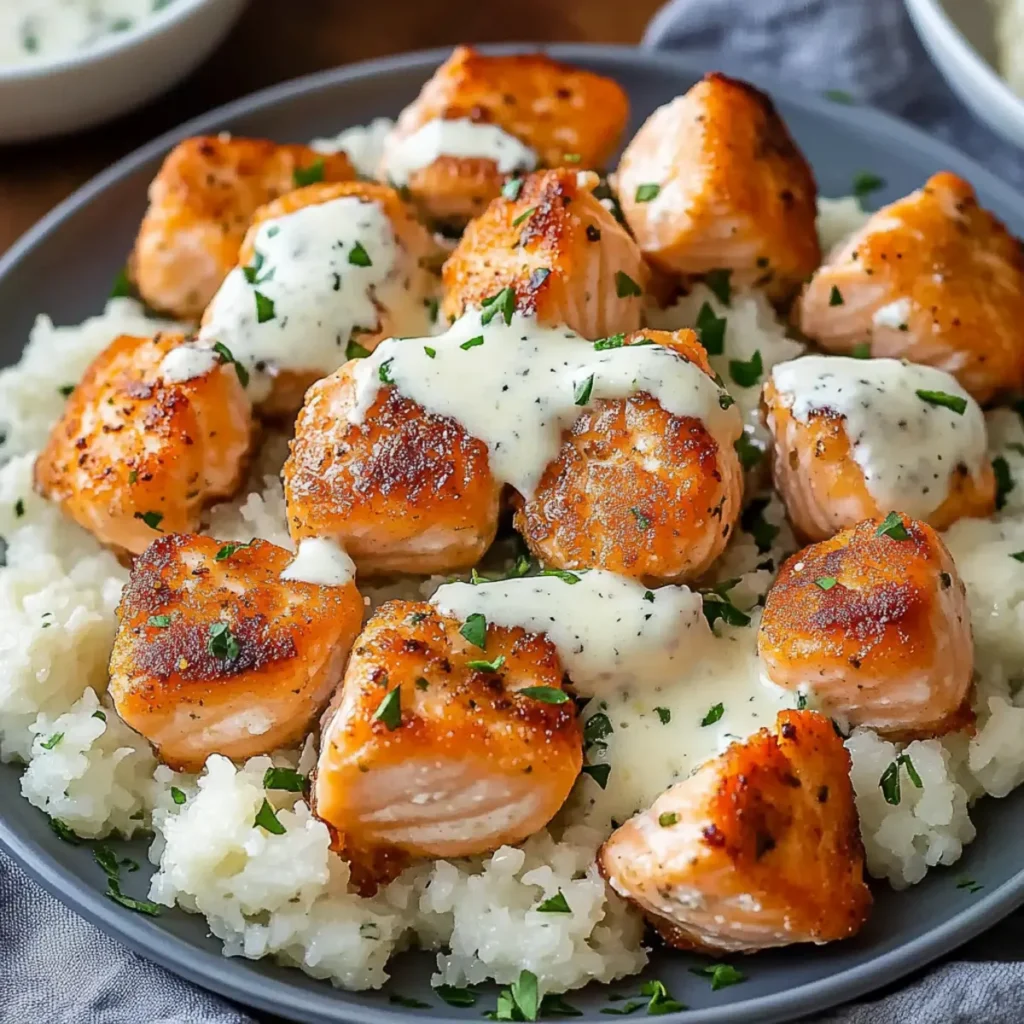
If you’ve ever bitten into a perfectly seared salmon, you already know the magic that happens when freshness meets seasoned perfection. Now, imagine that delicious fish transformed into Crispy Parmesan Salmon Bites with Creamy Garlic Sauce, a dish that’s practically an invitation to dance in the kitchen as you cook. This recipe is not just food; it’s a party on your plate, bursting with flavors that will have your taste buds cheering. Picture this: it’s a busy weeknight, and you’re furiously scrolling through cooking blogs, searching for something that feels special yet won’t keep you slaving away in the kitchen for hours. Let me assure you, with our Crispy Parmesan Salmon Bites with Creamy Garlic Sauce, you’re not just cooking; you’re creating an experience, one that’s perfect for cozy dinners or impressing guests. Your kitchen will smell divine, the kind of aroma that beckons your family in and promises a meal to remember. Ingredients for Crispy Parmesan Salmon Bites with Creamy Garlic Sauce Recipe Here’s what you’ll need to make this delicious Crispy Parmesan Salmon Bites with Creamy Garlic Sauce Recipe: 2 filets salmon (6 ounces each, skin removed) – Opt for fresh filets for the best taste and texture. You can also use frozen, just be sure to thaw completely before cooking. 1 tablespoon olive oil – A healthy fat that adds moisture and helps achieve that crispy exterior. 1 tablespoon fresh lime juice – Brightens up the dish with a zesty kick that complements the salmon beautifully. 0.5 teaspoon garlic (minced) – Enhances flavor and gives that delightful aromatic quality. 0.5 teaspoon paprika – Adds a subtle smokiness and vibrant color to the bites. 0.25 teaspoon kosher salt – Essential for bringing out the flavors of the other ingredients. 0.25 teaspoon black pepper – A must for that little warming kick in every bite. 4 tablespoons unsalted butter (½ stick) – Creamy richness that forms the base of the sauce and adds depth. 0.25 cup heavy cream – Ensures a luscious, velvety sauce that perfectly covers the salmon. 2 tablespoons garlic (minced) – Double the garlic for a robust flavor profile that’s oh-so-good. 1 tablespoon fresh parsley (minced) – Provides a fresh garnish that adds color and a hint of earthiness. 0.25 teaspoon kosher salt – A pinch here perfects the sauce’s flavor balance. 0.25 teaspoon black pepper – Completes the sauce with a final touch of warmth. How to Make Crispy Parmesan Salmon Bites with Creamy Garlic Sauce Recipe Follow these simple steps to prepare this delicious Crispy Parmesan Salmon Bites with Creamy Garlic Sauce Recipe: Step 1: Preheat and Prepare Get your air fryer buzzing by preheating it to 390°F. Spray the basket with some nonstick cooking spray to prevent these beauties from sticking. Step 2: Cut and Dry Using a paper towel, pat those salmon filets dry to ensure they get crispy. Then, slice each filet into 1-inch squares, and admire your chef-like skills in the process. Step 3: Coat the Salmon In a medium-sized bowl, mix together the olive oil, lime juice, minced garlic, paprika, salt, and pepper. Gently add the salmon bites and toss them until they are fully coated with the seasoning mixture. Step 4: Air Fry the Bites Place the salmon bites in a single layer in the air fryer basket. Cook for 4-5 minutes, then flip them and cook for an additional 4-5 minutes, or until they reach an internal temperature of 140-145°F. Keep an eye on them; you want that perfect golden crust! Step 5: Make the Creamy Garlic Sauce While your salmon is getting crispy, it’s time to whip up the creamy garlic sauce. In a medium saucepan over medium heat, melt the butter, then stir in the heavy cream, minced garlic, parsley, salt, and pepper. Let it bubble away for about 4-5 minutes until it’s beautifully combined. Step 6: Serve and Enjoy Transfer those crispy salmon bites to a plate and generously drizzle the dreamy garlic sauce over them. Serve them over fluffy mashed potatoes or rice for the ultimate flavor explosion. With these Crispy Parmesan Salmon Bites with Creamy Garlic Sauce at your table, you’ll never look at dinner the same way again. Let the flavors dance, and if anyone asks, just say you whipped them up in no time! Enjoy every savory bite, and don’t forget to share your masterpiece (or at least a bite) with someone special. Perfecting Crispy Parmesan Salmon Bites with Creamy Garlic Sauce Recipe Cooking Process Start by preheating your air fryer while you prepare the salmon bites. This ensures even cooking and that famous crispiness. Cut the salmon, mix your marinade, and toss it all together before cooking to maximize flavor and get everything ready for a seamless cooking experience. Add Your Touch to Crispy Parmesan Salmon Bites with Creamy Garlic Sauce Recipe Feel free to swap in different herbs, such as dill or basil, to give your garlic sauce a fresh twist. You can also add a pinch of cayenne pepper for a spicy kick or substitute a different type of fish, like cod, to suit your taste. Storing & Reheating Crispy Parmesan Salmon Bites with Creamy Garlic Sauce Recipe Store leftover salmon bites in an airtight container in the fridge for up to two days. When reheating, use the air fryer or oven at a low temperature to keep that delightful crispiness intact. Avoid microwaving as it can result in soggy fish. It was just last week when I served these Crispy Parmesan Salmon Bites at a small gathering. The way my friends dove into the dish and practically fought over the last bites was a moment I’ll never forget! FAQs About Crispy Parmesan Salmon Bites with Creamy Garlic Sauce Recipe What is Crispy Parmesan Salmon Bites with Creamy Garlic Sauce Recipe? Crispy Parmesan Salmon Bites with Creamy Garlic Sauce Recipe is an easy and delicious dish that combines the rich flavors of salmon with a crunchy Parmesan coating. The bites are air-fried to perfection, providing a
Easy Homemade Thousand Island Dressing Recipe in 5 Minutes
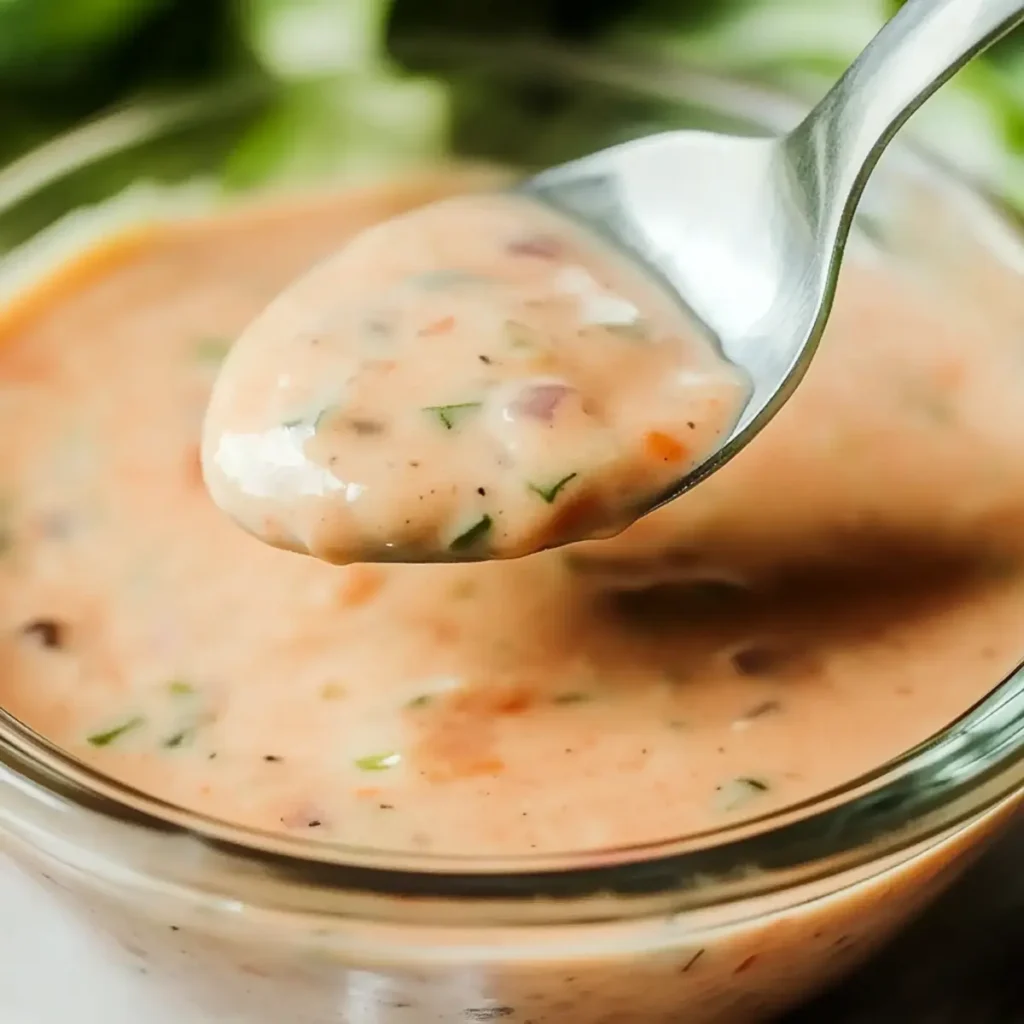
Imagine dipping crispy fries into a creamy pool of Thousand Island Dressing, where the rich flavors meet a zesty tang that wakes up your taste buds. This homemade sauce is the life of the party, transforming everything from salads to burgers into delectable masterpieces. Picture a sunny picnic day, a perfectly stacked burger in hand, with that velvety dressing pouring out — and you’re in food paradise. Now, let’s take a stroll down memory lane. I remember the chaotic kitchen during family barbecues, my Aunt Clara slapping together her famous Thousand Island Dressing in mere minutes while everyone impatiently awaited the feast. The excitement in the air was as electric as the aroma that wafted through the room. This dressing doesn’t just taste good; it brings people together, making it the perfect companion for any gathering. Ingredients for Thousand Island Dressing Here’s what you’ll need to make this delicious Thousand Island Dressing: 1/2 cup mayonnaise – The creamy base of your dressing; use a good-quality mayo for the best taste. 2 tablespoons ketchup – Adds sweetness and tang; opt for a natural or organic ketchup for a fresher flavor. 2 tablespoons sweet pickle relish – This is where the magic happens! It provides the crunchy, sweet punch that defines Thousand Island. 2 teaspoons finely diced onion – For a little bite and flavor depth; red onions work well if you want extra sweetness. 1/4 teaspoon finely minced garlic – A hint of garlic gives your dressing that aromatic warmth, balancing the sweetness beautifully. 1 teaspoon white vinegar – A splash of acidity to brighten up the dressing; you can also use lemon juice if you prefer. 1/8 teaspoon kosher salt – Just a pinch to enhance the flavors; adjust according to your taste. 2-3 dashes Tabasco sauce (optional) – If you like a kick, a few dashes will spice things up! How to Make Thousand Island Dressing Follow these simple steps to prepare this delicious Thousand Island Dressing: Step 1: Gather Your Ingredients Make sure you have everything listed above within arm’s reach. It’s always a good idea to measure out your ingredients ahead of time — trust me, you’ll appreciate it when it’s time to mix! Step 2: Combine the Base Ingredients In a small bowl, add your 1/2 cup of mayonnaise and 2 tablespoons of ketchup. Use a spatula or small whisk to blend these two ingredients until they are fully incorporated. This creamy base is the heart of your dressing! Step 3: Add the Flavor Makers Now, toss in the sweet pickle relish, finely diced onion, minced garlic, and white vinegar. Each ingredient plays a crucial role in crafting that signature flavor. Stir the mixture gently but thoroughly to ensure every bite has that delightful blend. Step 4: Season to Perfection Sprinkle in the kosher salt and give your creation a generous taste test. Do you feel the flavors dancing on your palate? Adjust the salt if needed and consider adding those optional dashes of Tabasco for an extra thrill. Step 5: Chill to Enhance the Flavor Cover your bowl with plastic wrap and pop it into the refrigerator for at least an hour. This resting period allows the flavors to meld together, creating that rich, harmonious taste that everyone loves. You can even let it sit overnight for the best results. Step 6: Ready to Serve! When you’re ready, give your Thousand Island Dressing a good stir and serve it alongside a fresh green salad, a towering burger, or anything else you fancy. The creamy texture will elevate your dish to new heights. Whether you’re hosting a summer barbecue, enjoying a quiet dinner, or just looking to jazz up your lunch, this Thousand Island Dressing is a simple yet satisfying addition. Enjoy the compliments that will surely come your way! You Must Know About Thousand Island Dressing This showstopping Thousand Island Dressing delivers restaurant-quality results using simple ingredients you probably already have at home. The perfect balance of textures and flavors creates an unforgettable dining experience that will have everyone asking for seconds. Picture-perfect presentation with vibrant colors makes this dish absolutely Instagram-worthy and guaranteed to impress any dinner guest. Incredibly versatile recipe that works beautifully for weeknight dinners, meal prep, special occasions, or even outdoor entertaining sessions. Perfecting Thousand Island Dressing Cooking Process To ensure a stunning Thousand Island Dressing, combine all your ingredients in a small bowl after prepping them. Whisk vigorously for an even blend, then taste for seasoning. Refrigerate to enhance the flavors, making this effortless yet delicious dish perfect for any gathering. Add Your Touch to Thousand Island Dressing Feel free to customize your Thousand Island Dressing by swapping mayonnaise for Greek yogurt for a tangy twist. Add diced hard-boiled eggs or a little Worcestershire sauce for extra flavor. Experiment with spices like paprika or dill to make it uniquely yours. Storing & Reheating Thousand Island Dressing Store any leftover Thousand Island Dressing in an airtight container in the refrigerator for up to a week. There’s no need to reheat; simply give it a good stir before serving to refresh those vibrant flavors. Sharing this dressing recipe always brings a smile to my friends’ faces as they inevitably ask for the recipe. It’s become a tradition at all our barbecues, a little reminder of how homemade dressing can change a simple meal into something spectacular. FAQs About Thousand Island Dressing What is Thousand Island Dressing? Thousand Island Dressing is a creamy, tangy condiment that adds a burst of flavor to salads, sandwiches, and burgers. Its characteristic reddish-orange color comes from the combination of mayonnaise and ketchup, along with sweet pickle relish and other flavorful ingredients. This dressing is a staple in many American households, often enjoyed on salads or as a dip, offering a delightful mix of sweetness and acidity. With its simple ingredients, it’s easy to whip up at home and customize to suit your taste! How can I use Thousand Island Dressing? Thousand Island Dressing is incredibly versatile!
Easy Longhorn Ranch Dressing Recipe with Fresh Herbs in 10 Minutes
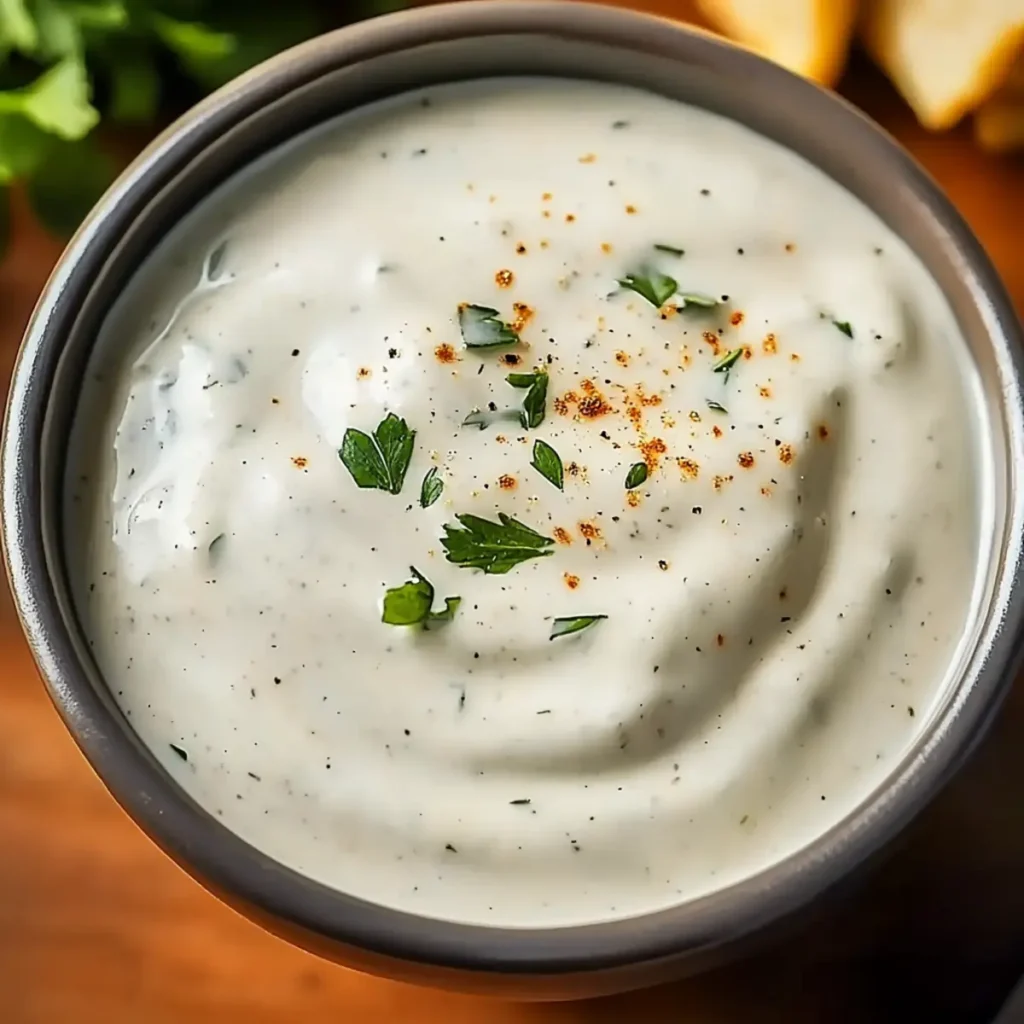
The aroma of fresh herbs mingling with creamy buttermilk creates an irresistible allure that will have you dreaming of crisp salads and hearty sandwiches. This Easy Longhorn Ranch Dressing Recipe with Fresh Herbs is a perfect blend of flavors that elevates any meal with just a drizzle or dip. Imagine a sunny picnic afternoon where friends gather around a table, indulging in fresh veggies crisped to perfection and served alongside this delightful dressing. It’s moments like these that fill your heart—and your stomach—creating unforgettable memories over good food and great company. Ingredients for Easy Longhorn Ranch Dressing Recipe with Fresh Herbs Here’s what you’ll need to make this delicious Easy Longhorn Ranch Dressing Recipe with Fresh Herbs: 1/2 cup Buttermilk – This tangy ingredient adds creaminess and a rich flavor to the dressing, perfect for enhancing the freshness of herbs. 1 cup Sour Cream – Provides a thick and dreamy texture while also balancing flavors with its slight tartness. 1/2 cup Mayonnaise – Adds a smooth richness that helps create a creamy consistency that’s simply irresistible. 1/4 tsp Minced Garlic – A touch of garlic elevates the dressing, giving it a savory depth that complements the other flavors beautifully. 1/4 tbsp Chopped Fresh Parsley – This herb brings an earthy freshness, enhancing the overall flavor profile of the ranch dressing. 1 tbsp Chopped Fresh Dill – Dill adds a delightful tang, reminiscent of summer gardens, creating that classic ranch flavor you love. 1/4 tbsp Chopped Fresh Chives – Their mild oniony flavor adds a zing that perfectly balances the creaminess of the dressing. 1/8 tsp Salt – A pinch of salt brings out the flavors, making every ingredient shine. 1 dash Black Pepper – Just a hint of pepper provides a little kick, enhancing the dressing’s overall flavor without overpowering it. How to Make Easy Longhorn Ranch Dressing Recipe with Fresh Herbs Follow these simple steps to prepare this delicious Easy Longhorn Ranch Dressing Recipe with Fresh Herbs: Step 1: Gather Your Ingredients Start by ensuring you have all your ingredients within reach. A medium-sized mixing bowl will be your best friend for this task, so grab that as well as a whisk or spoon for mixing. Step 2: Mix the Creamy Base In your mixing bowl, pour in the buttermilk, sour cream, and mayonnaise. Blend these creamy components together until they’re nice and smooth; this is the foundation of your dressing. Step 3: Add Your Flavor Boosters Next, it’s time to introduce the minced garlic, parsley, dill, and chives to the mix. Stir thoroughly to ensure that the herbs and garlic are distributed evenly throughout the creamy base, creating a symphony of flavors. Step 4: Season to Perfection Sprinkle in the salt and add a dash of black pepper. This step is crucial! Give it a good mix, and then taste it. Feel free to adjust the seasoning according to your preferences; after all, it’s your creation. Step 5: Chill for Maximum Flavor Cover your bowl with plastic wrap or pour the dressing into a jar with a secure lid. Place it in the refrigerator for at least one hour – this chilling time allows all those bold flavors to meld beautifully. Step 6: Serve and Enjoy Once the hour is up, take your dressing out and give it a good stir (or shake, if using a jar). Now, you’re ready to drizzle over salads, use as a dip for veggies, or slather on sandwiches and burgers. Enjoy the creamy deliciousness! And there you have it! You’ve successfully created an Easy Longhorn Ranch Dressing Recipe with Fresh Herbs that your family and friends will rave about. You may want to double the batch – just a heads-up! Perfecting Easy Longhorn Ranch Dressing Recipe with Fresh Herbs Cooking Process Start by whipping together the buttermilk, mayonnaise, and sour cream until smooth. Then, stir in the fresh herbs and seasonings for an even flavor blend. Chill for an hour to allow all the flavors to marry beautifully. Add Your Touch to Easy Longhorn Ranch Dressing Recipe with Fresh Herbs Feel free to play around with your herbs! Swap out parsley or dill for cilantro or chervil, or add a splash of lemon juice for a zesty kick. The possibilities are endless to make this ranch dressing your own. Storing & Reheating Easy Longhorn Ranch Dressing Recipe with Fresh Herbs Store your dressing in an airtight container in the refrigerator for up to a week. There’s no need to reheat, just give it a good stir before serving to refresh the flavors. Creating this dressing reminds me of the first time I served it at a family gathering. Everyone kept asking for the recipe; I felt like a culinary rockstar that day! FAQs About Easy Longhorn Ranch Dressing Recipe with Fresh Herbs What is Easy Longhorn Ranch Dressing Recipe with Fresh Herbs? The Easy Longhorn Ranch Dressing Recipe with Fresh Herbs is a delightful homemade dressing that combines creamy buttermilk, mayonnaise, and sour cream, mixed with fresh herbs like dill, parsley, and chives. This dressing not only enhances salads but also serves as a flavorful dip for vegetables and a zesty condiment for sandwiches. Making it from scratch allows you to control the flavors and ingredients, ensuring it’s as fresh and tasty as possible. How long can I store Easy Longhorn Ranch Dressing Recipe with Fresh Herbs? You can store your Easy Longhorn Ranch Dressing Recipe with Fresh Herbs in an airtight container in the refrigerator for up to a week. Just make sure to give it a good stir before serving to redistribute the ingredients. The flavors meld together beautifully during storage, making it even more delicious as the days go by. Can I modify the Easy Longhorn Ranch Dressing Recipe with Fresh Herbs? Absolutely! One of the best aspects of the Easy Longhorn Ranch Dressing Recipe with Fresh Herbs is its versatility. Feel free to experiment with different herbs like cilantro or tarragon, or add a splash of lemon