
Easy Homemade Chicken Taco Seasoning Recipe in 5 Minutes
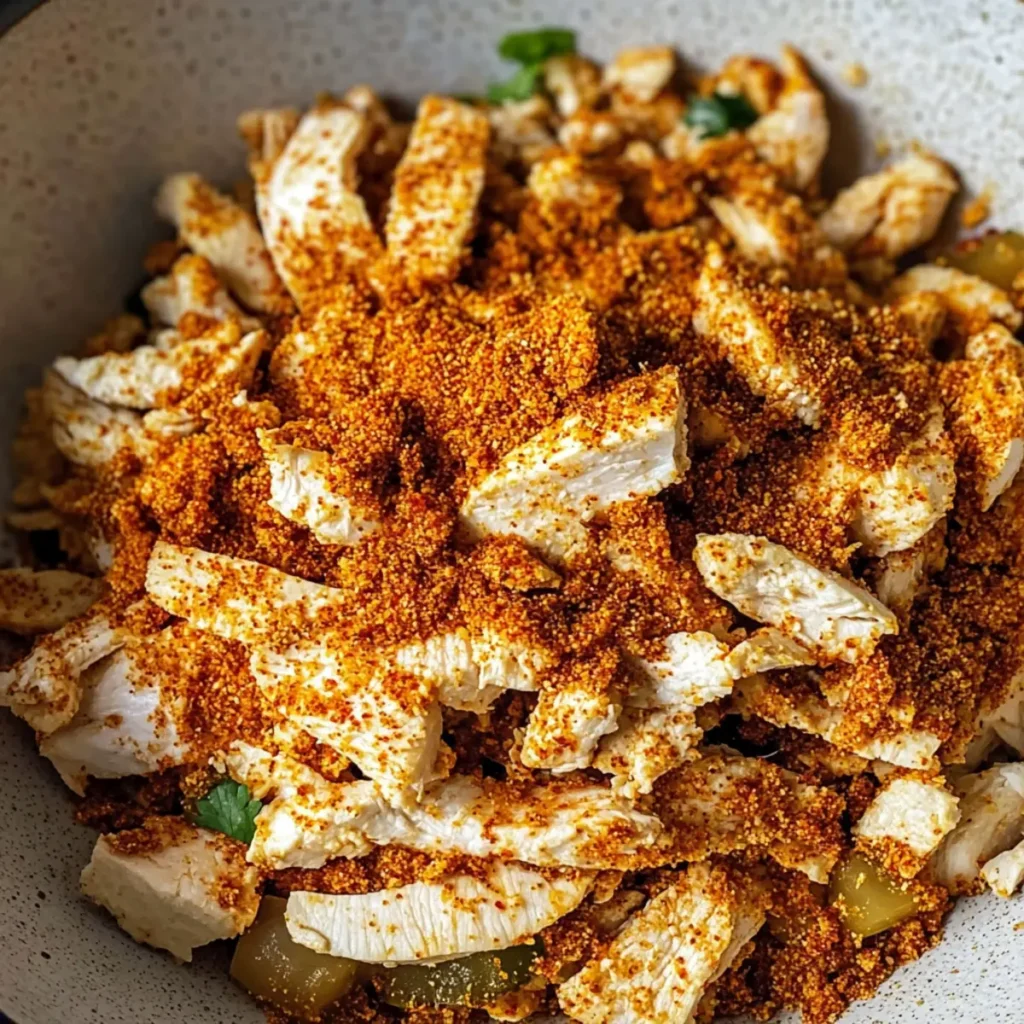
There’s something magical about the tantalizing aroma of Chicken Taco Seasoning wafting through the kitchen, isn’t there? It transports you to vibrant taco stands, where savory spiced meats sizzle on a grill, making your mouth water in anticipation. This Chicken Taco Seasoning is no ordinary mix; it’s a flavorful anthem that can elevate any dish from mundane to magnificent, all in just five minutes. Picture yourself gathered around a table with friends, laughter spilling over as you dive into a feast teeming with flavor. Whether it’s Taco Tuesday or just a Wednesday that needs a little pep, this homemade Chicken Taco Seasoning is here to save the day and make each bite an adventure in taste. We’re on a flavorful journey that’s approachable, delightful, and just a sprinkle of seasoning away. Let’s dive in and create something delicious that’s sure to bring everyone together! Ingredients for Chicken Taco Seasoning Here’s what you’ll need to make this delicious Chicken Taco Seasoning: 1 tbsp chili powder – This adds a mild heat and depth, making it a staple in any taco mix. 1 tbsp cumin – Brings a warm, earthy flavor that is essential for that authentic Mexican taste. 1 tbsp paprika – This enhances the color of the seasoning and offers a subtle sweetness. 1 tbsp garlic powder – Provides a robust, savory flavor that makes everything taste better. 1 tbsp onion powder – Adds a hint of sweetness and a punch of flavor without the tears. 1 tsp dried oregano – Infuses a fragrant herbiness that balances the spices perfectly. 1 tsp salt – Essential for enhancing all the natural flavors of the ingredients. 1 tsp black pepper – Adds a bit of spice to round out the seasoning mix. 1 tsp cayenne pepper – For those who like it hot, this will give your tacos a delightful kick! How to Make Chicken Taco Seasoning Follow these simple steps to prepare this delicious Chicken Taco Seasoning: Step 1: Gather Your Ingredients Before you start mixing, gather all your spices and measuring spoons. You want everything at your fingertips for a seamless seasoning experience. Step 2: Combine Ingredients in a Bowl In a medium mixing bowl, carefully add all the dried spices: chili powder, cumin, paprika, garlic powder, onion powder, oregano, salt, black pepper, and cayenne. Step 3: Mix Until Well Blended Using a whisk or a fork, mix all the ingredients together thoroughly until the colors blend into a beautiful reddish-brown hue, indicating that the flavors are marrying each other. Step 4: Taste Test Your Seasoning Dip a clean spoon into the mix and have a taste. If you desire more heat, this is the perfect moment to sprinkle in a little more cayenne! Step 5: Store for Future Use Once mixed, transfer your Chicken Taco Seasoning into an airtight container. Label it with the date; it’ll stay fresh and flavorful when stored in a cool, dry place for months! Step 6: Season Your Dish Use about 2 tablespoons of this seasoning per pound of chicken for that perfect blend of flavor. Toss with your chicken before grilling, baking, or sautéing for that unbeatable taco taste. Get ready to serve your tacos with all your favorite toppings, whether it’s crisp lettuce, creamy avocado, or zesty lime. Trust me, the flavor explosion will have everyone coming back for seconds! Perfecting Chicken Taco Seasoning Cooking Process To achieve the best flavor, start by mixing all the spices together thoroughly. Once blended, apply this Chicken Taco Seasoning generously onto your chicken before searing it to lock in the flavor, creating a savory crust. Add Your Touch to Chicken Taco Seasoning Feel free to customize your Chicken Taco Seasoning by adding more heat with extra cayenne or experimenting with smoked paprika for a unique twist. You can even toss in some zest by adding lime or orange peel. Storing & Reheating Chicken Taco Seasoning Store any leftover Chicken Taco Seasoning in an airtight container in a cool, dry place. If you need to reheat cooked dishes, simply warm them on low heat in a pan for the best flavor retention. The first time I made this Chicken Taco Seasoning, my friends raved about it, insisting it was better than any restaurant. It became our go-to for Taco Tuesdays, sparking laughter and tasty memories every week. FAQs About Chicken Taco Seasoning What is Chicken Taco Seasoning? Chicken Taco Seasoning is a dynamic blend of spices perfect for enhancing the flavor of your chicken dishes, especially tacos. This seasoning typically includes ingredients like chili powder, cumin, paprika, garlic powder, onion powder, oregano, salt, black pepper, and cayenne pepper. The combination creates a balanced flavor profile that adds a zesty kick to your meals, making it suitable for both simple weeknight dinners and festive gatherings. It’s quick to prepare and can easily be customized to suit your taste. Whether for shredded chicken or grilled pieces, this seasoning is a must-have in every spice cabinet. How do I use Chicken Taco Seasoning? Using Chicken Taco Seasoning is simple and rewarding. Start by rubbing the seasoning generously onto your chicken before cooking. You can use it for grilling, baking, or sautéing chicken to create a delightful, flavorful crust. For best results, allow the seasoned chicken to marinate for at least 30 minutes, or even overnight for a deeper flavor infusion. Add it to your stir-fry or even sprinkle some into soups or stews for a spicy twist. The versatility of Chicken Taco Seasoning makes it a great addition to various recipes. Can I customize my Chicken Taco Seasoning? Absolutely! One of the great things about Chicken Taco Seasoning is its versatility. Feel free to adjust the heat level by adding extra cayenne or experiment with different spices like smoked paprika for a distinct flavor. You can also add a dash of lime or orange zest for a citrusy brightness. Consider adding less common spices like chipotle powder for smokiness, or even a pinch of cinnamon to bring warmth
Delicious Cucumber and Hummus Bites Ready in Just 15 Minutes

When you think of fresh, crunchy bites that burst with flavor, Cucumber and Hummus Bites are the first thing that should come to mind. Picture this: crisp cucumber rounds crowned with a creamy dollop of smooth hummus, sprinkled with vibrant paprika, and garnished with fresh parsley. Just one bite transports you to a sunny picnic, where laughter fills the air, and every munch sends a wave of foodie joy through your soul. These delightful bites are not just a feast for the taste buds; they also bring a certain flair to your gatherings. Whether it’s a laid-back get-together with friends or an elegant soirée, Cucumber and Hummus Bites come to the rescue as the perfect appetizer, striking a balance between healthy snacking and indulgent eating. Get ready to tantalize your taste buds and impress your guests, all with this ultra-simple, yet oh-so-elegant dish. Ingredients for Cucumber and Hummus Bites Here’s what you’ll need to make this delicious Cucumber and Hummus Bites: 2 medium cucumbers – Choose firm, fresh cucumbers for optimal crunch; you can peel them if desired for a different texture. 1 cup hummus – Store-bought or homemade, this creamy spread serves as the star of the show. Opt for your favorite flavor to jazz it up. 1 tablespoon paprika – This spice adds a beautiful color and a hint of flavor; smoked paprika can add a lovely depth if you’re feeling adventurous. 2 tablespoons fresh parsley – Finely chopped and used as a garnish, it brings a fresh, herby brightness that complements the hummus beautifully. How to Make Cucumber and Hummus Bites Follow these simple steps to prepare this delicious Cucumber and Hummus Bites: Step 1: Slice the Cucumbers Start by washing your cucumbers under cool running water to remove any dirt. Using a sharp knife, slice the cucumbers into rounds about half an inch thick. Aim for uniformity; this will ensure even presentation. Step 2: Add the Hummus Take your cucumber rounds and place them on a serving platter. Using a spoon or a small cookie scoop, dollop a generous amount of hummus onto each cucumber round. You want enough hummus to create a satisfying bite but not so much that it spills over! Step 3: Sprinkle with Paprika Here’s where the magic happens! Grab that paprika and sprinkle a dash over each dollop of hummus. This not only enhances flavor but adds a beautiful pop of color that will make your guests marvel at your culinary skills. Step 4: Garnish with Parsley To finish off your Cucumber and Hummus Bites, sprinkle the finely chopped fresh parsley over the top. This adds a lovely freshness that not only looks stunning but elevates the overall flavor profile. Step 5: Serve and Enjoy Your beautiful Cucumber and Hummus Bites are now ready to be devoured! Serve them immediately at your gathering, and watch as they vanish in the blink of an eye. They’re best enjoyed fresh, with the crunch of cucumber contrasting perfectly with the creaminess of the hummus. Step 6: Optional Variations Feel free to customize these bites to your liking! You can swap out the paprika for a sprinkle of chili flakes if you prefer a kick. Add sliced olives, cherry tomatoes, or even a drizzle of balsamic glaze for an unexpected twist that will surprise and delight your guests. With just 15 minutes of prep time, you can whip up these Cucumber and Hummus Bites for any occasion. They make a perfect snack, a bright addition to a party platter, or a fresh appetizer before dinner. Enjoy creating moments of joy with every bite, and remember, sharing is optional—everyone deserves to treat themselves! Perfecting Cucumber and Hummus Bites Cooking Process Start by slicing the cucumbers into perfectly even rounds, then dollop hummus on each slice. Once topped, sprinkle paprika and finish with fresh parsley for a vibrant presentation. This method ensures every bite is a flavorful masterpiece. Add Your Touch to Cucumber and Hummus Bites Feel free to get creative! Swap out the hummus for guacamole for a zesty twist or add diced bell peppers for an extra crunch. Experimenting with spices can elevate your bites to a whole new level. Storing & Reheating Cucumber and Hummus Bites To keep your Cucumber and Hummus Bites fresh, store them in an airtight container in the refrigerator. They’re best enjoyed cold, and should be consumed within two days for optimal freshness and flavor. Sharing these delightful Cucumber and Hummus Bites at a party once turned me into the unofficial snack queen! Friends couldn’t get enough of them, and it was a joy to hear their compliments. FAQs About Cucumber and Hummus Bites What are Cucumber and Hummus Bites? Cucumber and Hummus Bites are a delightful and healthy appetizer that combines fresh cucumber slices with creamy hummus, seasoned to perfection. This no-cook recipe is incredibly easy to prepare, making it perfect for gatherings or quick snacks. Just slice cucumbers into rounds, dollop hummus on each slice, and top with a sprinkle of paprika and fresh parsley. They are visually appealing and offer a refreshing crunch, ideal for those looking for a light yet satisfying nibble. How do you serve Cucumber and Hummus Bites? Cucumber and Hummus Bites are best served chilled for maximum freshness. Arrange them on a vibrant platter for an eye-catching presentation. They can be plated as part of an appetizer spread during parties or served individually as a healthy snack option. For an added touch, consider pairing them with drinks, such as cocktails or refreshing iced teas, making them an easy and elegant choice for any gathering. Can Cucumber and Hummus Bites be made ahead of time? Absolutely! Cucumber and Hummus Bites can be prepared a few hours in advance, making them perfect for busy hosts. Just make sure to store them in an airtight container in the refrigerator until serving time. However, it’s best to assemble them shortly before serving to ensure the cucumbers remain crisp and firm. If you want to save time,
Delicious French Onion Sausage Rolls Recipe Perfect for Parties

There’s something magical about the aroma of French Onion Sausage Rolls wafting through your kitchen. Imagine biting into a flaky puff pastry, only to discover a savory blend of seasoned sausage, sweet caramelized onions, and gooey Gruyère cheese, all harmonizing beautifully in your mouth. If that doesn’t set your taste buds tingling, I’m not sure what will! These delightful rolls are perfect for gatherings, cozy nights in, or those moments when you need a little comfort food to lift your spirits. Every time I make French Onion Sausage Rolls, I am transported back to family gatherings where laughter filled the air and food was the star of the show. You can practically hear the applause as these rolls vanish from the platter, leaving only the memory of their deliciousness behind. It’s this irresistible flavor combination that will have your friends and family begging for more, and trust me, the kitchen will smell like heaven while you whip these up! Ingredients for French Onion Sausage Rolls Here’s what you’ll need to make this delicious French Onion Sausage Rolls: 1 lb Ground Sausage – Use your favorite type, whether spicy or mild, to suit your flavor preference. 2 cups Onions – Sweet yellow onions are ideal for caramelizing and bringing out rich flavors. 1 cup Gruyère Cheese – This Swiss cheese adds a nutty, melty goodness that pairs perfectly with the sausage. 2 tbsp Butter – For sautéing the onions until they reach golden perfection. 1 tsp Thyme – Fresh or dried, thyme adds an aromatic herb flavor that elevates the dish. 1 tsp Salt – A little seasoning goes a long way in enhancing all the flavors. 1/2 tsp Black Pepper – Adds a touch of warmth and complements the sausage beautifully. 1 sheet Puff Pastry – The light and flaky base that holds all this deliciousness together. 1 Egg – Beaten, this will be used for brushing the tops before baking, giving them a golden finish. How to Make French Onion Sausage Rolls Follow these simple steps to prepare this delicious French Onion Sausage Rolls: Step 1: Caramelize the Onions Melt the butter over medium heat in a skillet. Add the thinly sliced onions, stirring occasionally. Let them sauté for about 15 minutes until they are deep golden brown and tender. Patience is key; if they brown too quickly, they may burn instead of caramelize! Step 2: Mix the Filling In a large bowl, combine the sautéed onions with the ground sausage, Gruyère cheese, thyme, salt, and black pepper. Use your hands or a spoon to mix everything until well combined. The aroma will get your mouth watering just thinking about it! Step 3: Prepare the Puff Pastry Preheat your oven to 400°F (200°C). Roll out the puff pastry sheet on a lightly floured surface. Cut the pastry into rectangles, roughly 4″x6″, leaving enough space to fill and fold them over. Step 4: Assemble the Rolls Spoon a generous portion of the sausage mixture onto each pastry rectangle. Roll them up carefully, sealing the edges with a little bit of water to help them stick together. Don’t worry if they’re not perfect; the deliciousness will make up for any imperfections! Step 5: Brush and Bake Place the rolled sausage pastries on a baking sheet lined with parchment paper. Brush the tops with the beaten egg to create that beautiful golden color. Bake in the preheated oven for about 25 minutes, or until they puff up and turn golden brown. Step 6: Serve and Enjoy Remove from the oven and let cool for a few minutes before transferring to a serving platter. Watch those rolls disappear as you serve them hot and fresh. You might want to keep a few hidden away for yourself! These French Onion Sausage Rolls are sure to become a favorite in your home. Whether for a party, game night, or just because it’s a Tuesday, you’re guaranteed a hit with these delightful bites. Prepare to bask in the compliments that will surely come your way! This showstopping French Onion Sausage Rolls delivers restaurant-quality results using simple ingredients you probably already have at home. The perfect balance of textures and flavors creates an unforgettable dining experience that will have everyone asking for seconds. Picture-perfect presentation with vibrant colors makes this dish absolutely Instagram-worthy and guaranteed to impress any dinner guest. Incredibly versatile recipe that works beautifully for weeknight dinners, meal prep, special occasions, or even outdoor entertaining sessions. Perfecting French Onion Sausage Rolls Cooking Process Sauté the onions to bring out their sweetness first, then mix with the ground sausage and cheese. While the mixture cools, roll out the puff pastry for the quickest assembly. Finally, brush them with egg wash for that golden color during baking. Add Your Touch to French Onion Sausage Rolls Feel free to swap the Gruyère with cheddar or add some garlic to the sautéed onions for an extra flavor kick. You can also toss in cooked mushrooms or spinach for more filling options that excite your taste buds. Storing & Reheating French Onion Sausage Rolls Store any leftovers wrapped in aluminum foil in the fridge for up to three days. When you’re ready to enjoy them again, simply reheat in a preheated oven at 350°F for about 10-15 minutes until hot and crispy. The first time I made French Onion Sausage Rolls, my friends devoured them in mere minutes while asking for the recipe. The laughter and joy around the table reminded me how food truly brings people together. FAQs About French Onion Sausage Rolls What are French Onion Sausage Rolls? French Onion Sausage Rolls are a scrumptious appetizer that combines the rich flavors of caramelized onions and savory ground sausage, all wrapped in crispy puff pastry. These delightful rolls are finished with a golden egg wash to create a beautiful presentation that everybody loves. They are perfect for parties, game day, or just a cozy night in. Each bite offers a harmonious blend of textures and flavors, making them
Homemade Fajita Seasoning Recipe Ready in Just 5 Minutes

The tantalizing aroma of sizzling bell peppers, tender chicken, and a burst of spices swirling in the air can only mean one thing: it’s fajita night! And what better way to elevate your fajitas than with a vibrant and flavorful Homemade Fajita Seasoning? In just five minutes, you can whip up a spice blend that rivals anything you’ll find at a restaurant, bringing your taste buds to a fiesta of flavors. This Homemade Fajita Seasoning is not just about seasoning your meals; it’s about creating memories around the table. Each sprinkle adds a touch of zest to your family dinner or a fun gathering with friends, transforming mundane weeknight meals into culinary adventures. You’ll find yourself reaching for this seasoning blend every time you cook up a storm in the kitchen! Ingredients for Homemade Fajita Seasoning Here’s what you’ll need to make this delicious Homemade Fajita Seasoning: 1 tablespoon chili powder – This will provide the foundational heat and depth of flavor your fajitas crave. 1 teaspoon cumin – Adds a warm, earthy note that enhances the spice blend altogether. 1 teaspoon paprika – Choose smoked paprika for a touch of smokiness that tantalizes the taste buds. 1 teaspoon garlic powder – A must-have for that unmistakable umami flavor that pairs perfectly with meats and veggies. 1 teaspoon onion powder – Balances out the spices with a subtle sweetness. 1/2 teaspoon oregano – Imparts a hint of herbaceous freshness to round out the flavors. 1/2 teaspoon salt – Essential for bringing the whole mix together and enhancing the other flavors. 1/4 teaspoon black pepper – Adds warmth without overpowering the blend. 1/4 teaspoon cayenne pepper – For those who like it hot, this will kick the seasoning up a notch. How to Make Homemade Fajita Seasoning Follow these simple steps to prepare this delicious Homemade Fajita Seasoning: Step 1: Gather Your Ingredients Start by collecting all the spices and seasonings you’ll need. A small mixing bowl and a whisk or a fork will work great for this purpose. Step 2: Combine Ingredients In your mixing bowl, add the chili powder, cumin, paprika, garlic powder, onion powder, oregano, salt, black pepper, and cayenne pepper. The colors will start to come together beautifully. Step 3: Mix Thoroughly Using your whisk or fork, stir the spices together until they are well mixed and uniform in color. Imagine you’re conjuring your own magic potion; this seasoning will indeed work wonders on your meals! Step 4: Store Properly Transfer your Homemade Fajita Seasoning into an airtight container or a small glass jar. Make sure to label it so it doesn’t become one of those mysterious jars in the back of the cupboard. Step 5: Use As Desired When you’re ready to cook, sprinkle this seasoning over your protein and veggies before grilling or sautéing. Feel the excitement build as your kitchen fills with delicious aromas! Step 6: Enjoy! Once cooked, serve your fajitas on warm tortillas with your favorite toppings like guacamole, salsa, or cheese. Sit back and savor the burst of flavors from your Homemade Fajita Seasoning! Homemade Fajita Seasoning is not just a blend of spices; it’s the very heart of any great fajita dish. With its beautiful balance of warmth, heat, and bold flavors, it’s perfect for carne asada, shrimp, or even some roasted veggies for a vegetarian option. The best part? You can adjust the cayenne if you want a spicier kick or leave it out entirely for a milder version. So, next time you’re tempted to reach for that store-bought seasoning mix, remember that a little time spent making your own can lead to a flavor-packed treat that your friends and family will rave about. Plus, you know exactly what’s going into your food—no mysterious chemicals or additives here! Enjoy your new secret weapon in the culinary world and let those fajitas steal the show! Perfecting Homemade Fajita Seasoning Cooking Process To make the most of your Homemade Fajita Seasoning, combine all the spices first. Prepare your protein or veggies while the seasoning harmonizes. Sear everything to lock in flavors before adding any liquid, ensuring the result is as fabulous as it sounds. Add Your Touch to Homemade Fajita Seasoning Feel free to swap out spices based on what you have at home. Try adding some fresh lime zest or a pinch of smoked paprika for an extra kick. Toss in some dried chipotle for a smoky twist or a dash of sugar for a sweet contrast. Storing & Reheating Homemade Fajita Seasoning Store any leftover Homemade Fajita Seasoning in an airtight container in a cool, dry place. For reheating, simply sprinkle it over your dish while cooking or mix it into a little olive oil for a flavor booster that comes alive again. Sometimes, the most unexpected moments create the best memories. I still remember the first time I introduced my homemade fajita seasoning to friends during a barbecue. Their delighted faces made me realize that food has an incredible way of bringing people together, even if it’s just a simple seasoning blend! FAQs About Homemade Fajita Seasoning What is Homemade Fajita Seasoning? Homemade Fajita Seasoning is a flavorful blend of spices used to elevate your fajita dishes. Typically made from common pantry staples, it combines chili powder, cumin, paprika, garlic powder, and herbs for a zesty kick. By mixing these ingredients, you create a robust and aromatic seasoning that perfectly complements grilled meats and vegetables. Instead of relying on store-bought packets that may contain preservatives, making your own seasoning allows you to adjust the flavors to your liking, ensuring every bite bursts with freshness. How do you use Homemade Fajita Seasoning? Using Homemade Fajita Seasoning is incredibly easy and versatile! Simply sprinkle the desired amount over your choice of protein—beef, chicken, or shrimp—along with your favorite vegetables. Make sure to coat the ingredients evenly for maximum flavor. You can marinate the mix for deeper flavor absorption or cook it right away for a quick meal. The spices
Easy Salmon Tartare Recipe with Fresh Ingredients and Tips

There’s nothing quite like the delicate, refreshing flavors of an Easy Salmon Tartare Recipe with Fresh Ingredients and Tips to brighten up your day. Imagine tender, buttery salmon mingling with zesty lemon, crunchy capers, and the subtle kick of jalapeño, all diced into perfect little pieces. This dish is not only delicious but also visually stunning, making it an ideal centerpiece for any gathering or a luxurious treat for a cozy night in. Have you ever found yourself dreaming of breezy beach picnics or sophisticated dinner parties? This Easy Salmon Tartare Recipe effortlessly brings those visions to life, whisking you away to culinary paradise with each savory bite. Think of it as an edible love letter to celebrations, picnics, or even just a personal reward for a productive week! Ingredients for Easy Salmon Tartare Recipe with Fresh Ingredients and Tips Here’s what you’ll need to make this delicious Easy Salmon Tartare Recipe with Fresh Ingredients and Tips: 1 lb fresh salmon – Make sure it’s sushi-grade for the best flavor and a safe, raw experience. 1 Tbsp olive oil – This adds richness and depth to the tartare. 3 Tbsp red onion – Finely diced to contribute a sweet crunch that complements the salmon. 1 heaping Tbsp capers – Roughly chopped for a briny burst of flavor. ½ small jalapeño – Diced finely to add a hint of spice, adjusting to your heat preference. 1 tsp Dijon mustard – For a zesty kick that elevates the overall taste. 1 lemon – Zested and juiced, to brighten the dish and balance flavors. 2 tsp fresh chives – Thinly sliced for a pop of color and mild onion flavor. For serving: Choose crostini, thinly sliced baguette, crackers, chips, or even some crudité to scoop up the delicious tartare. How to Make Easy Salmon Tartare Recipe with Fresh Ingredients and Tips Follow these simple steps to prepare this delicious Easy Salmon Tartare Recipe with Fresh Ingredients and Tips: Step 1: Prepare the Salmon Optional, but for easier slicing, you can quick freeze the salmon for about 15 minutes. Pat it dry with a paper towel to remove excess moisture, ensuring it holds together nicely in your tartare. Slice the salmon filet into ¼-inch thick planks and then cut it into ¼-inch thick strips before dicing everything into neat little cubes. Step 2: Combine Ingredients In a large bowl, add the diced salmon, followed by the olive oil, finely diced red onion, chopped capers, Dijon mustard, lemon zest, fresh lemon juice, diced jalapeño, and sliced chives. Toss everything gently but thoroughly, ensuring every piece of salmon is coated in the wonderful mix of flavors. Step 3: Let it Rest Allow the mixture to sit for about 5-10 minutes. This resting period lets the flavors meld beautifully, enhancing that rich, zesty delight that makes your taste buds sing. Don’t forget to taste and adjust the seasoning as needed. Step 4: Plate with Style To make a stunning presentation, you can serve the salmon tartare in a bowl or assemble it in a 3-inch round mold. Once plated, refrigerate until you’re ready to serve. If using a mold, carefully lift it off to reveal a perfect little tower of tartare. Step 5: Serve and Enjoy Pair your stunning salmon tartare with crostini, crackers, or chips. It’s also delightful over a bed of salad greens for a fresh, light meal. Plate up and enjoy the comments from your captivated audience! This Easy Salmon Tartare Recipe with Fresh Ingredients and Tips is sure to impress, proving that simplicity mixed with flavor can create magic. So roll up your sleeves, gather your ingredients, and let’s get cooking—trust me, your taste buds will thank you! This showstopping Easy Salmon Tartare Recipe with Fresh Ingredients and Tips delivers restaurant-quality results using simple ingredients you probably already have at home. The perfect balance of textures and flavors creates an unforgettable dining experience that will have everyone asking for seconds. Picture-perfect presentation with vibrant colors makes this dish absolutely Instagram-worthy and guaranteed to impress any dinner guest. Incredibly versatile recipe that works beautifully for weeknight dinners, meal prep, special occasions, or even outdoor entertaining sessions. Perfecting Easy Salmon Tartare Recipe with Fresh Ingredients and Tips Cooking Process The key to perfecting the process of this Easy Salmon Tartare Recipe with Fresh Ingredients and Tips lies in preparation. Start by dicing your salmon, followed by combining all the other ingredients. This sequence ensures that your flavors meld beautifully while keeping your kitchen tidy. Add Your Touch to Easy Salmon Tartare Recipe with Fresh Ingredients and Tips Feel free to customize your Easy Salmon Tartare Recipe with Fresh Ingredients and Tips! Swap out salmon for tuna or even scallops, add avocado for creaminess, or spice it up with a bit of wasabi for heat. Storing & Reheating Easy Salmon Tartare Recipe with Fresh Ingredients and Tips To maintain freshness, store any leftover Easy Salmon Tartare Recipe with Fresh Ingredients and Tips in an airtight container in the fridge. Consume within 24 hours. Avoid reheating, as this dish is best enjoyed cold. Sometimes, I whip up this Easy Salmon Tartare Recipe with Fresh Ingredients and Tips for my friends, and their faces light up! One friend even declared it “life-changing,” which made my cooking heart swell with pride. FAQs About Easy Salmon Tartare Recipe with Fresh Ingredients and Tips What is Easy Salmon Tartare Recipe with Fresh Ingredients and Tips? The Easy Salmon Tartare Recipe with Fresh Ingredients and Tips is a delightful dish that combines fresh salmon with vibrant flavors. This no-cook recipe features diced salmon mixed with ingredients like red onion, capers, jalapeño, and zesty lemon, creating a harmonious blend that’s both refreshing and satisfying. Perfect for impressing guests or enjoying as a healthy snack, this tartare showcases the quality of fresh ingredients while being simple to prepare. How do I choose the best salmon for my Easy Salmon Tartare Recipe with Fresh Ingredients and Tips? When selecting salmon for your tartare, freshness
Delicious Small Batch Sourdough Bread Recipe for Beginners
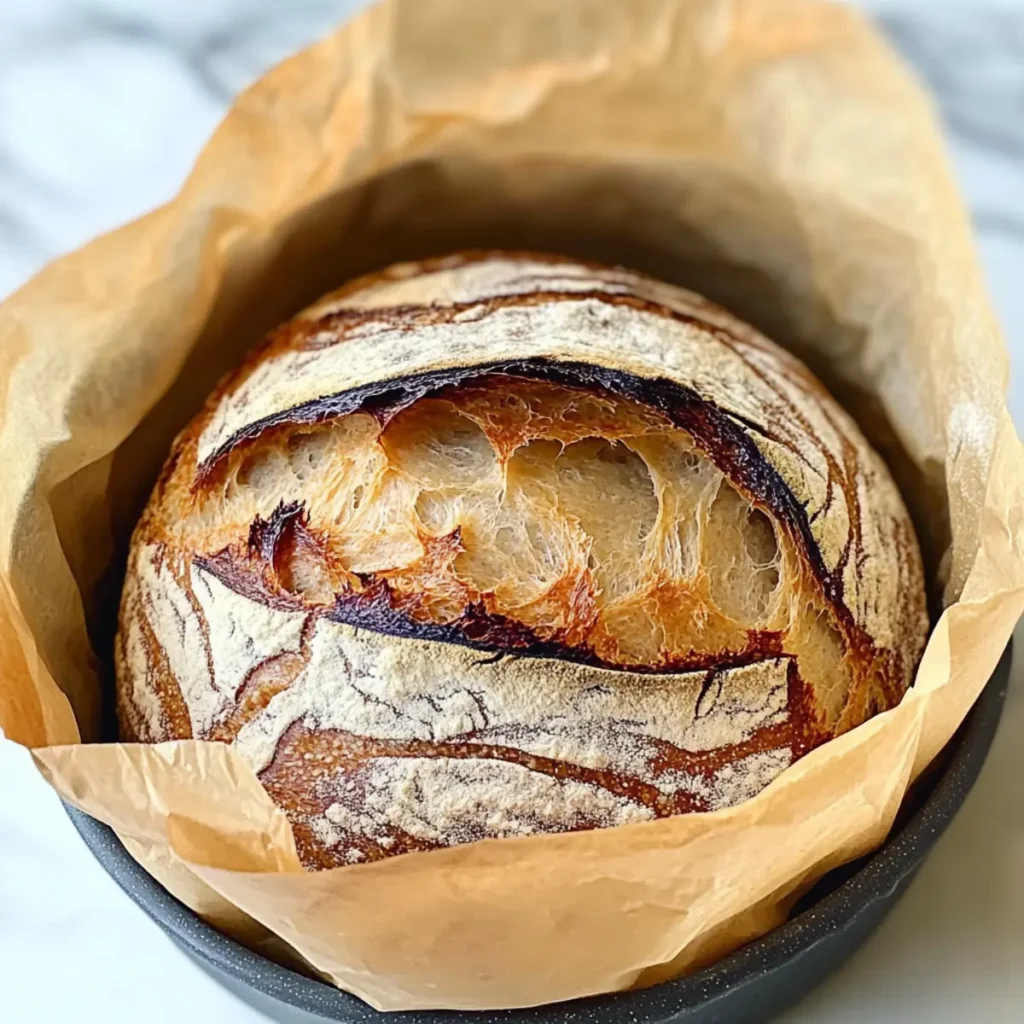
There’s something magical about the aroma of freshly baked sourdough bread wafting through your kitchen. The moment you take that first bite, your taste buds dance with joy at the crackly crust, soft interior, and slightly tangy flavor—it’s pure bliss. That’s why I’m excited to share this delicious small batch sourdough bread recipe for beginners, a recipe that transforms simple ingredients into a masterpiece bursting with flavor. If you’re new to the world of sourdough, fear not! This recipe is not only beginner-friendly; it’s also the perfect opportunity to bring a slice of artisanal goodness into your home. Picture yourself enjoying warm slices slathered with butter or turning them into the best toast you’ve ever tasted. Every bite promises to transport you to comfort food heaven, and it’s a journey worth taking. So grab your apron and let’s embark on this delicious adventure! Ingredients for Delicious Small Batch Sourdough Bread Recipe for Beginners Here’s what you’ll need to make this delicious Delicious Small Batch Sourdough Bread Recipe for Beginners: 250 g Bread Flour – Look for high-quality bread flour that has a higher protein content for better gluten development, which leads to that perfect rise and texture. 175 g Water – Use filtered water that’s lukewarm, as it helps activate the sourdough starter and encourages fermentation. 50 g Sourdough Starter (Fed and Bubbly) – A healthy sourdough starter is key to achieving that beloved tangy flavor. Make sure it’s been fed a few hours before you start baking. 5 g Salt – Don’t underestimate the power of salt; it enhances flavor and strengthens the dough. Opt for sea salt for the best results. How to Make Delicious Small Batch Sourdough Bread Recipe for Beginners Follow these simple steps to prepare this delicious Delicious Small Batch Sourdough Bread Recipe for Beginners: Step 1: Mix the Perfect Dough Weigh out your sourdough starter and water into a large mixing bowl. Use a fork or whisk to mix the water and starter together until incorporated. Then add the flour and salt, combining them until you have a shaggy dough—think of it as the messy beginnings of your soon-to-be legendary bread. Step 2: Autolyse the Dough Cover your bowl with a damp tea towel, letting it sit for around 1 hour. This step allows the flour to fully hydrate and begins gluten formation, leading to a fantastic texture in your bread. Step 3: Bring It All Together After the autolyse, bring the dough together by stretching it up and folding it over itself. Do this until it’s smooth, then let it rest for 30 minutes. This can be a great time to pour yourself a cup of tea and revel in the aromas of baking magic brewing. Step 4: Stretch and Fold Over the next few hours, perform 4–6 sets of stretch and folds. Stretch the dough four times for each set, resting it for 15 minutes in between. This crucial step builds strength and structure, giving your bread that bakery-quality bounce. Step 5: Bulk Fermentation Cover the dough with plastic wrap, allowing it to bulk ferment until it doubles in size—this usually takes around 4 to 6 hours. If you’re impatient, just remember that good things come to those who wait! Step 6: Shape Your Bread Once the first ferment is done, shape the dough into a boule or batard on a floured surface using rice flour to prevent sticking. Place it into a floured proofing basket, smooth side down, and cover it loosely with a plastic bag. This is where the real artistry comes into play—the shaping process is where your loaf starts to take its final form. Step 7: Cold Proof Now, pop it in the fridge for anywhere from 5 to 36 hours. The longer it sits, the richer the flavor develops, making your patience pay off in spades. Step 8: Preheat the Oven When ready to bake, preheat your oven to 230°C (450°F) with a Dutch Oven inside for at least 1 hour. This step is what will create that beautiful oven spring and crunchy crust we all crave. Step 9: Score and Bake Remove the dough from the fridge and gently place it onto parchment paper. Score the top of the dough with a sharp knife or razor blade—it’s like giving your bread a little haircut right before its big moment. Carefully transfer the dough to the preheated Dutch Oven, cover it, and bake for 30 minutes. Step 10: Finish Baking Remove the lid after 30 minutes and bake for an additional 10 to 15 minutes at 210°C (410°F). This step gives your bread that golden-brown color and crispy crust. Once baked, remove the loaf and place it on a wire rack to cool. Your mouth will water at the sight of that lovely loaf! Now all that’s left to do is slice into this masterful creation and enjoy the fruits of your labor. This delicious small batch sourdough bread recipe for beginners isn’t just a recipe—it’s an invitation to savor the process and celebrate the rich rewards of home baking. Perfecting Delicious Small Batch Sourdough Bread Recipe for Beginners Cooking Process To achieve the best results with your Delicious Small Batch Sourdough Bread Recipe for Beginners, start by mixing your starter and water before adding the flour and salt. Follow up with an autolyse period to let the dough relax, then proceed with stretch and fold techniques for the ideal texture. Add Your Touch to Delicious Small Batch Sourdough Bread Recipe for Beginners Feel free to customize your sourdough with herbs like rosemary or spices such as paprika for a flavorful twist. You can also experiment by adding cheese or olives to the dough for an elevated experience that will wow your taste buds. Storing & Reheating Delicious Small Batch Sourdough Bread Recipe for Beginners Store your sourdough bread in a paper bag at room temperature to maintain its crusty exterior. For reheating, pop it in a preheated oven for about 10 minutes to refresh the
Quick and Easy Air Fryer Chicken Chop Bites Recipe in 15 Minutes

Are you ready for a flavor explosion that can happen in just 15 minutes? Let me introduce you to Quick and Easy Air Fryer Chicken Chop Bites. Imagine biting into succulent chicken pieces, perfectly seasoned and crispy on the outside, juicy on the inside, and all without the fuss of a full-blown dinner prep. That’s right—this dish is here to rescue those busy weeknights when all you want is something delectable in a flash. Whether you’re planning a cozy night in, a family gathering, or just need to satisfy a serious craving for chicken, these air fryer bites are the answer. Not only will they keep your taste buds dancing, but you’ll also feel like a kitchen superstar—no professional chef skills required! Ingredients for Quick and Easy Air Fryer Chicken Chop Bites Here’s what you’ll need to make this delicious Quick and Easy Air Fryer Chicken Chop Bites: 1 lb boneless, skinless chicken breast or tenders – Choose high-quality pieces for superior flavor; you can cut them into bite-sized nuggets for an easier cooking experience. 1 teaspoon cornstarch – This helps create that delightful crispy coating that you’ll adore; it’s a little magic powder that works wonders. 1 teaspoon salt – Essential for enhancing flavors; feel free to adjust to your taste preferences. 1 tablespoon seasoning of your choice – Select your favorite blend! Classic garlic powder, smoky paprika, or even a dash of spicy Cajun will take these bites to the next level. Avocado oil spray – This helps prevent sticking while adding a touch of healthy fats; it’s perfect for the air fryer. How to Make Quick and Easy Air Fryer Chicken Chop Bites Follow these simple steps to prepare this delicious Quick and Easy Air Fryer Chicken Chop Bites: Step 1: Prepare the Chicken First things first, cut your chicken breast or tenders into 1-inch bite-sized pieces. This not only helps with even cooking but ensures every piece is packed with flavor. Step 2: Season Like a Pro In a mixing bowl, toss the chicken pieces with cornstarch, salt, and your chosen seasoning. Make sure every morsel gets a good coating because nobody likes a bland bite, right? Step 3: Preheat the Air Fryer Spray the air fryer basket with avocado oil spray to ensure that your chicken bites don’t stick. Preheating is key—set it to 400°F (200°C) and let that heat work its magic. Step 4: Arrange in the Basket Once preheated, place the seasoned chicken bites in the air fryer basket in a single layer. Avoid overcrowding to ensure they cook evenly. Think of it as allowing each piece to have its moment in the spotlight! Step 5: Time to Air Fry Cook the chicken bites for about 10 minutes. Don’t forget to shake the basket halfway through to guarantee that all parts get that delicious crispy finish. Step 6: Final Touches and Serve When the timer goes off, check for doneness—juicy on the inside and golden on the outside. Transfer to a serving plate and pair it with your favorite dipping sauce. You might want to grab some napkins—you’re not just eating; you’re indulging! Now that you know how to whip up this fantastic dish in no time, imagine your kitchen filled with the irresistible aroma of mouthwatering chicken bites. Whether you’re sharing them at an enticing dinner party or devouring them solo while binge-watching your favorite show, these Quick and Easy Air Fryer Chicken Chop Bites will surely steal the show. The beauty of this recipe is its versatility. Switch up the seasonings based on what you have on hand, or even cater to specific diets. The possibilities are as endless as your taste buds’ cravings! So, gather your ingredients, fire up that air fryer, and embark on a flavorful culinary journey. The kitchen is calling, and it’s time to answer with a resounding yum! Perfecting Quick and Easy Air Fryer Chicken Chop Bites Cooking Process To ensure your Quick and Easy Air Fryer Chicken Chop Bites turn out perfectly, start by seasoning the chicken first. Then, prepare the air fryer while watching for the ideal temperature. Right after that, it’s time to get air frying for that golden crisp. Add Your Touch to Quick and Easy Air Fryer Chicken Chop Bites Make these Quick and Easy Air Fryer Chicken Chop Bites your own by swapping chicken for turkey or adding spices like smoked paprika. You can even toss in garlic powder or fresh herbs to elevate the flavor experience. Storing & Reheating Quick and Easy Air Fryer Chicken Chop Bites Store your Quick and Easy Air Fryer Chicken Chop Bites in an airtight container in the refrigerator for up to three days. Reheat in the air fryer at 350°F for about 5 minutes to restore that crunchy goodness. Sharing the first batch of these Quick and Easy Air Fryer Chicken Chop Bites with my family was a game changer. They devoured them so quickly, I almost didn’t get to try one myself! FAQs About Quick and Easy Air Fryer Chicken Chop Bites What is Quick and Easy Air Fryer Chicken Chop Bites? Quick and Easy Air Fryer Chicken Chop Bites are delightful pieces of chicken that are marinated in seasonings and cooked in an air fryer until they’re perfectly crispy and golden. This recipe makes use of simple ingredients—just chicken, cornstarch, salt, and your preferred seasoning—delivering delicious bites in just 15 minutes. It’s a fantastic way to enjoy a healthier version of fried chicken without all the oil, capturing that crunchy texture we all crave! How do I ensure my Quick and Easy Air Fryer Chicken Chop Bites come out crispy? To achieve maximum crispiness in your Quick and Easy Air Fryer Chicken Chop Bites, the key is to coat the chicken evenly with cornstarch and your choice of seasoning before air frying. Make sure to spray the air fryer basket with avocado oil, as this will help create a delightful crust. Additionally, arranging the chicken in a single layer without
Crispy Parmesan Smashed Potatoes Recipe for Perfectly Crunchy Bites

The smell of roasting potatoes fills the air as you prepare to indulge in a delightful serving of Crispy Parmesan Smashed Potatoes. This dish is not just a side; it’s the ultimate comfort food that promises a symphony of crunchy and creamy textures, topped off with the rich nuttiness of Parmesan. Your taste buds are in for an adventure that combines buttery goodness with a garlic-kissed crust that will make you the star of your dinner table. Whether you’re hosting a gathering, searching for a new family favorite, or just craving something irresistibly crunchy, these potatoes are the answer. With just a handful of ingredients, you can create a masterpiece that’s perfect for any occasion, from casual weeknight dinners to elegant celebrations. Let’s get you started! Ingredients for Crispy Parmesan Smashed Potatoes Here’s what you’ll need to make this delicious Crispy Parmesan Smashed Potatoes: 2 pounds small yellow and/or red potatoes – These potatoes have a creamy texture that holds up well when smashed, making them perfect for this recipe. 2 tablespoons olive oil, divided – A healthy fat to crisp the potatoes and enhance their flavor. 2 tablespoons butter, melted – Adds richness and a fabulous buttery taste that you’ll love. 1 teaspoon kosher salt – Enhances the flavors of the ingredients to bring everything together. 1 teaspoon granulated garlic or garlic powder – Infuses each bite with that unmistakable garlic goodness. ½ teaspoon freshly ground black pepper – Provides a gentle kick of spice to balance the flavors. ½ cup freshly grated Parmesan cheese – The star of the show, adding a savory, nutty flavor that elevates the dish. 2 tablespoons chopped fresh Italian parsley, divided – A fresh pop of color and flavor to garnish the potatoes. How to Make Crispy Parmesan Smashed Potatoes Follow these simple steps to prepare this delicious Crispy Parmesan Smashed Potatoes: Step 1: Prepare the Potatoes Preheat your oven to 425°F. Place the potatoes in a large pot and cover them with water. Bring to a boil and cook until fork-tender, which should take about 15 minutes. Once they are done, drain the water and set them aside. Step 2: Smash the Potatoes Coat a baking sheet with 1 tablespoon of olive oil. Using tongs, transfer the hot potatoes onto the oiled baking sheet. Grab the back of a heavy measuring cup and smash each potato down to about ¼ inch thick. Remember, the goal is to create a nice surface area for crisping. Step 3: Season Generously Drizzle the smashed potatoes with the remaining tablespoon of olive oil and the melted butter, making sure they are well coated. Now season the potatoes with kosher salt, garlic, and freshly ground black pepper. Sprinkle a teaspoon of chopped parsley on top for a touch of freshness. Step 4: Roast the Potatoes Place the baking sheet in your preheated oven and roast for about 30 minutes. You want them to be golden brown and crispy around the edges. The aroma will have your mouth watering in anticipation. Step 5: Add the Parmesan After 30 minutes, remove the baking sheet from the oven and sprinkle the freshly grated Parmesan on top of each potato. Return the baking sheet to the oven for an additional 5 minutes, just enough time for the cheese to melt and get slightly bubbly. Step 6: Garnish and Serve Once the potatoes are beautifully golden and the cheese deliciously melted, remove them from the oven. Generously sprinkle with the remaining parsley for a pop of color. Serve warm and watch them disappear in record time! These Crispy Parmesan Smashed Potatoes are not only a delicious addition to any meal, but they also bring joy and laughter to your dining experience. So get ready for some crispy, cheesy magic at your dinner table! Enjoy! This showstopping Crispy Parmesan Smashed Potatoes delivers restaurant-quality results using simple ingredients you probably already have at home. The perfect balance of textures and flavors creates an unforgettable dining experience that will have everyone asking for seconds. Picture-perfect presentation with vibrant colors makes this dish absolutely Instagram-worthy and guaranteed to impress any dinner guest. Incredibly versatile recipe that works beautifully for weeknight dinners, meal prep, special occasions, or even outdoor entertaining sessions. Perfecting Crispy Parmesan Smashed Potatoes Cooking Process To achieve crispy Parmesan smashed potatoes, start by boiling the potatoes to fork-tender perfection, then arrange them on a baking sheet and smash before seasoning. A robust drizzle of oil and butter preps them for roasting, ensuring that golden, crunchy goodness we all crave. Add Your Touch to Crispy Parmesan Smashed Potatoes Get creative with crispy Parmesan smashed potatoes by substituting other cheeses like cheddar or adding spices such as smoked paprika or chili flakes. Toss in crispy bacon bits or serve alongside your favorite dipping sauces to elevate this delightful side dish. Storing & Reheating Crispy Parmesan Smashed Potatoes To store crispy Parmesan smashed potatoes, keep them in an airtight container in the fridge for up to three days. When reheating, place them back in the oven for a few minutes to restore their crunch, avoiding the sogginess that often ruins leftovers. Sometimes, I think back to the time I made these crispy Parmesan smashed potatoes for a gathering, and my friends couldn’t stop raving about them. It felt like I should have charged admission with all that appreciation! FAQs About Crispy Parmesan Smashed Potatoes What is Crispy Parmesan Smashed Potatoes? Crispy Parmesan smashed potatoes are a delightful side dish made from small yellow or red potatoes that are boiled until tender, then smashed and roasted to achieve a perfectly crunchy texture. Enhanced with olive oil, butter, garlic, and topped with melted Parmesan cheese, these potatoes are infused with rich flavors. They provide a great contrast between cheesy goodness and crispy edges, making them an ideal accompaniment to any meal, from casual dinners to special occasions. The vibrant parsley garnish adds a touch of elegance, making these potatoes not just delicious but also visually appealing. How do
Delicious Garlic & Herb Sourdough Bread Recipe with Twists
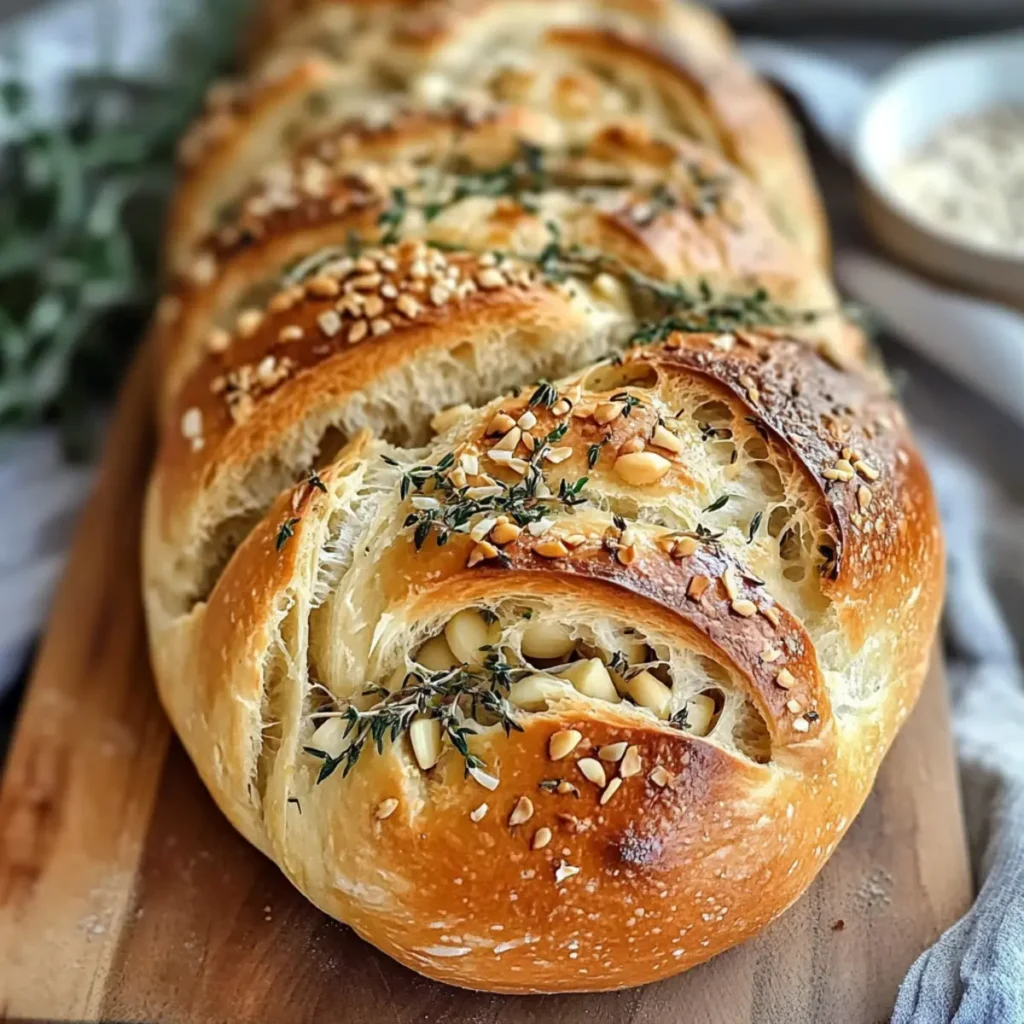
There’s nothing quite like the aroma of freshly baked bread wafting through your home, especially when it’s a delicious garlic & herb sourdough bread recipe with twists. The combination of aromatic garlic and fresh herbs not only tantalizes your taste buds but also makes your kitchen feel warm and inviting. This recipe is not just bread; it’s a heartfelt creation that brings the family together. Imagine gathering around the table, tearing into warm slices of this flavorful loaf, slathered in butter. It’s perfect for cozy dinners, special gatherings, or simply enjoying a quiet evening at home with your favorite book. With each bite, you’ll find yourself transported to a quaint little bakery, where the magic of good food happens. Ingredients for Delicious Garlic & Herb Sourdough Bread Recipe with Twists Here’s what you’ll need to make this delicious delicious garlic & herb sourdough bread recipe with twists: 100 g sourdough starter – A live culture that gives the bread its unique rise and tangy flavor; make sure it’s bubbly for best results. 500 g bread flour – Strong flour ideal for bread-making, providing the structure your loaf needs. 8 g salt – Essential for flavor and controlling the fermentation process; sea salt or table salt work well. 50 g butter (melted) – Adds richness and moisture to the bread, helping it stay tender. 200 g milk (slightly warm) – Using warm milk helps activate the yeast while keeping the bread flavorful and soft. 50 g water (warm) – Enhances hydration for the perfect dough consistency; ensure it’s not too hot to kill the yeast. 3 cloves garlic (finely diced) – Fresh garlic adds an irresistible, aromatic punch to your loaf. 50 g Parmesan cheese (grated) – A savory addition that complements the garlic and herbs with depth and richness. 100 g salted butter (softened at room temp) – Folded in for flavor, while keeping the bread soft and fluffy. 1 bunch fresh herbs (thyme, basil, parsley, sage) – Choose your favorite herbs for a fresh burst of flavor that elevates this dish. How to Make Delicious Garlic & Herb Sourdough Bread Recipe with Twists Follow these simple steps to prepare this delicious delicious garlic & herb sourdough bread recipe with twists: Step 1: Combine the Dry Ingredients In a large mixing bowl, combine the sourdough starter, bread flour, and salt. Make sure they’re well mixed; this forms the base of your dough. Step 2: Add the Wet Ingredients Melt the butter and let it cool slightly before adding it along with the warm milk and warm water to the dry ingredients. Stir until everything comes together into a shaggy dough. Step 3: Incorporate Flavor Add the finely diced garlic and grated Parmesan cheese to the dough, folding them in until they are evenly distributed. The aroma will start to make your mouth water! Step 4: Knead the Dough Turn the dough out onto a lightly floured surface and knead it until it becomes smooth and elastic, about 8 to 10 minutes. Don’t skip this step; it’s key for developing gluten. Step 5: Fold in Butter and Herbs Once your dough is ready, knead in the softened salted butter and fresh herbs until they are well incorporated, adding extra flavor and moisture. Step 6: Let it Rise Place the dough in a greased bowl and cover it with a damp cloth. Let it rise in a warm place until it doubles in size, which generally takes about 1 to 2 hours depending on your kitchen temperature. Step 7: Shape Your Loaf Once risen, punch the dough down to release air. Shape it into a loaf and place it in a greased baking pan. Allow it to rise again until it has expanded slightly, about 30 minutes. Step 8: Bake to Perfection Preheat your oven to 375°F (190°C). Once preheated, bake your loaf for 30 to 40 minutes, or until it’s golden brown and sounds hollow when tapped on the bottom. Step 9: Cool and Serve Once baked, take it out of the oven and let it cool for a bit before slicing. This helps retain moisture and flavor. Serve warm or at room temperature; it’s delicious either way! This delicious garlic & herb sourdough bread recipe with twists is more than just food; it’s a warm hug in loaf form. So grab a slice, slather on some extra butter, and enjoy the fruits of your labor. Happy baking! This showstopping Delicious Garlic & Herb Sourdough Bread Recipe with Twists delivers restaurant-quality results using simple ingredients you probably already have at home. The perfect balance of textures and flavors creates an unforgettable dining experience that will have everyone asking for seconds. Picture-perfect presentation with vibrant colors makes this dish absolutely Instagram-worthy and guaranteed to impress any dinner guest. Incredibly versatile recipe that works beautifully for weeknight dinners, meal prep, special occasions, or even outdoor entertaining sessions. Perfecting Delicious Garlic & Herb Sourdough Bread Recipe with Twists Cooking Process Start by mixing the sourdough starter, flour, and salt, followed by blending in the wet ingredients. Knead the dough until smooth. After the first rise, shape your loaf and let it rise again before baking for a golden finish. Add Your Touch to Delicious Garlic & Herb Sourdough Bread Recipe with Twists Feel free to swap out fresh herbs with dried ones or experiment with different cheeses, like cheddar or feta. Add chopped sun-dried tomatoes or olives for an exciting twist that will surprise your taste buds. Storing & Reheating Delicious Garlic & Herb Sourdough Bread Recipe with Twists To store your sourdough bread, wrap it in a clean kitchen towel and keep it in a cool place. When reheating, pop slices in a toaster or oven for a crispy refresh. Sometimes, I whip up this garlic and herb sourdough to impress guests, and the joy on their faces when they take the first bite is always priceless. FAQs About Delicious Garlic & Herb Sourdough Bread Recipe with Twists What is Delicious Garlic
Crispy Air Fryer Cauliflower Bites with Buffalo Sauce Recipe

Crispy Air Fryer Cauliflower Bites with Buffalo Sauce Recipe is the ultimate game-changer for anyone who craves a delightful crunch without the guilt. Imagine golden-brown, crispy cauliflower florets coated in tangy buffalo sauce, hitting all the right notes with each bite. This dish is perfect for snacking during a movie night or jazzing up your weeknight dinners. If you thought healthy eating meant sacrificing flavor, think again. These Crispy Air Fryer Cauliflower Bites are not only deliciously addictive but also incredibly fun to prepare. Picture yourself whipping up a batch, inhaling the aroma of spices as they mingle harmoniously in your kitchen, and anticipating that first crispy bite that brings a satisfying crunch, followed by a punch of vibrant flavors. Perfect for game days, gatherings, or simply enjoying alone, this recipe promises to satisfy your taste buds every time. Ingredients for Crispy Air Fryer Cauliflower Bites with Buffalo Sauce Recipe Here’s what you’ll need to make this delicious Crispy Air Fryer Cauliflower Bites with Buffalo Sauce Recipe: ⅔ cup all-purpose flour – This acts as the main coating for our cauliflower, giving it that satisfying crunch. ¼ cup cornstarch – Helps to enhance the crispiness of the cauliflower when cooked in the air fryer. 1 teaspoon garlic powder – Adds a subtle yet delightful garlic flavor that enhances the overall taste. 1 teaspoon onion powder – Provides a sweet and savory note, making every bite even more enticing. 1 teaspoon paprika – Contributes a mild smokiness and an appealing color to the bites. ½ teaspoon sea salt – Essential for enhancing the flavors of the spices and cauliflower. ¾ cup water – Used to create the batter, ensuring a nice coating on the florets. 1 head cauliflower (about 2 pounds) – Fresh cauliflower is key; look for firm heads with tightly packed florets. Buffalo Sauce – Optional, but highly recommended for brushing on after cooking to achieve that signature kick. Vegan Ranch – For dipping, this adds a cooling contrast to the heat of the buffalo sauce. How to Make Crispy Air Fryer Cauliflower Bites with Buffalo Sauce Recipe Follow these simple steps to prepare this delicious Crispy Air Fryer Cauliflower Bites with Buffalo Sauce Recipe: Step 1: Preheat the Air Fryer Begin by preheating your air fryer to 400°F. That’s right, heat it up! You want it nice and toasty for that golden crisp you crave. Step 2: Make the Batter In a large bowl, whisk together the all-purpose flour, cornstarch, garlic powder, onion powder, paprika, and sea salt until well combined. Gradually add the water, stirring until you achieve a smooth batter that can elegantly coat each cauliflower floret. Step 3: Coat the Cauliflower Trim the cauliflower head into bite-sized florets. Add the florets to the batter, stirring gently to ensure each piece is thoroughly coated in that glorious mixture. They should be well-dressed, just like you for that dinner party you’ve been dreaming about. Step 4: Arrange in the Air Fryer Lift the coated cauliflower out of the batter, allowing any excess to drip back into the bowl. Carefully place the florets in a single layer in the air fryer basket, making sure not to overcrowd them. If necessary, work in batches; nobody likes a soggy cauliflower. Step 5: First Air Fry Air fry the cauliflower bites for 9 minutes. Then, remove them from the air fryer and use a spatula to carefully flip each floret over. This is where it gets exciting – brush them lightly with buffalo sauce and pop them back into the air fryer. Step 6: Final Fry Air fry for another 5 to 10 minutes, or until the cauliflower is beautifully dark and crisp around the edges. Seriously, just check the color – it should look like you just made a trip to a fancy restaurant. Serve your crispy treats hot with a final brushing of buffalo sauce for that extra kick. If you’re feeling fancy or need a cooling contrast to the heat, pair them with a side of vegan ranch for dipping. Trust me, these bites will melt your heart. Now you’ve got a mouthwatering recipe to impress your friends, family, or even just yourself. Enjoy your delicious adventure with these Crispy Air Fryer Cauliflower Bites with Buffalo Sauce Recipe! Perfecting Crispy Air Fryer Cauliflower Bites with Buffalo Sauce Recipe Cooking Process To achieve the best results, prep your cauliflower and batter first. Then, preheat the air fryer while you coat the cauliflower, maximizing efficiency. Air frying in batches ensures each floret gets the perfect crisp without overcrowding. Add Your Touch to Crispy Air Fryer Cauliflower Bites with Buffalo Sauce Recipe Feel free to swap the all-purpose flour with almond flour for a gluten-free option or add nutritional yeast to the batter for an extra cheesy flavor. Don’t hesitate to experiment with your favorite spices, too! Storing & Reheating Crispy Air Fryer Cauliflower Bites with Buffalo Sauce Recipe Store any leftovers in an airtight container in the fridge for up to three days. To reheat, simply pop them back in the air fryer at 350°F for about 5 minutes to restore their crispiness. Sharing my first attempt at making these bites remains a cherished memory; my friends raved about their crispy texture and zingy flavor, and I knew I had struck gold in the recipe department. FAQs About Crispy Air Fryer Cauliflower Bites with Buffalo Sauce Recipe What is Crispy Air Fryer Cauliflower Bites with Buffalo Sauce Recipe? Crispy Air Fryer Cauliflower Bites with Buffalo Sauce Recipe is a delightful, health-conscious alternative to traditional buffalo wings. This recipe offers a savory cauliflower treat that is crispy on the outside and tender inside, all while being coated in a spicy Buffalo sauce for that extra kick. The magic happens in the air fryer, where the cauliflower florets become perfectly crispy without the need for deep frying. This vegan-friendly option is perfect for gatherings, movie nights, or enjoying as a snack on your own. How do I make Crispy Air Fryer