
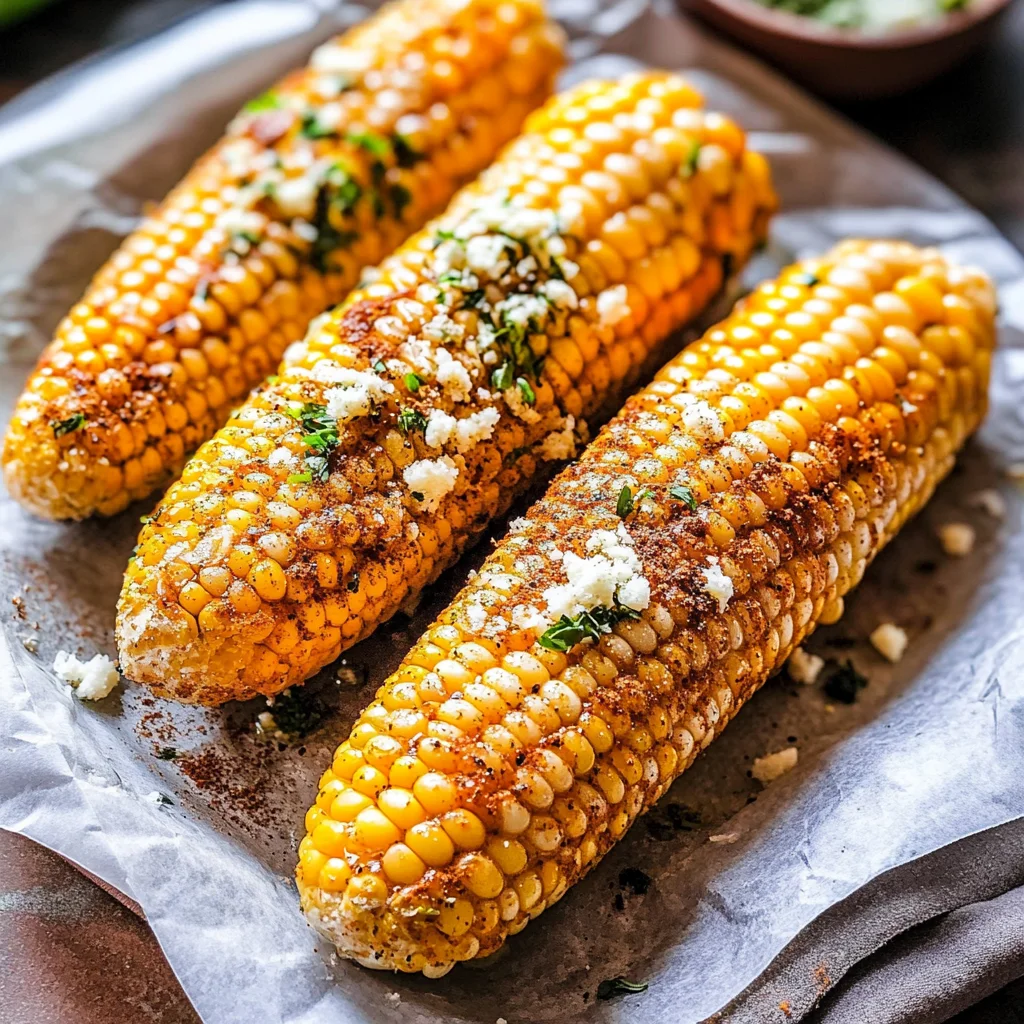
Imagine sinking your teeth into a perfectly roasted ear of corn on the cob in the oven, where each bite bursts with sweet, buttery goodness and a hint of smokiness that dances across your taste buds. The golden kernels glisten under a light brush of olive oil, their tender texture complemented by the irresistible aroma wafting through the kitchen, making it impossible not to anticipate that first satisfying crunch.
This delightful dish brings back memories of summer evenings spent outdoors, laughing with friends while savoring every delicious morsel. Whether you’re serving it at a backyard barbecue or enjoying it as a simple side dish for dinner, corn on the cob in the oven elevates any occasion, leaving everyone craving more of its mouthwatering flavor. So fire up that oven and get ready for an unforgettable culinary experience!
Why Is corn on the cob in the oven So Irresistibly Good?
Deliciously tender and juicy, this dish elevates your summer barbecues. Quick prep means you can spend more time with friends and family. Buttery goodness combined with a sprinkle of salt, pepper, and paprika creates a flavor explosion. Versatile enough to complement any meal, it’s a guaranteed crowd-pleaser that will have everyone coming back for seconds!
corn on the cob in the oven Ingredients
- For the Corn
- 4 ears corn on the cob (Husked and cleaned) – Fresh, sweet corn is essential for that juicy burst of flavor when roasted.
- For the Seasoning
- 4 tablespoons butter (Melted) – Butter adds richness and helps to enhance the natural sweetness of the corn on the cob in the oven.
- 1 teaspoon salt (To taste) – Salt brings out all the flavors, making each bite a delightful experience.
- 1 teaspoon black pepper (To taste) – Black pepper adds a subtle kick that balances perfectly with the sweetness of the corn.
- 1 teaspoon paprika (Optional) – Paprika introduces a mild smokiness and vibrant color to your roasted corn, elevating its appearance and taste.
Step-by-Step corn on the cob in the oven

1. Preheat your oven to 400°F (200°C). This is the perfect temperature for roasting, ensuring your corn will be tender and flavorful when done.
2. Husk the corn and remove all silk strands. Make sure to get every bit of silk for a clean bite, revealing those beautiful golden kernels.
3. Wrap each ear of corn in aluminum foil, sealing tightly. This step locks in moisture, resulting in juicy corn on the cob that’s bursting with flavor.
4. Place the wrapped corn on a baking sheet. This will make it easy to handle and catch any drips while baking in the oven.
5. Bake in the preheated oven for 30 minutes. During this time, you’ll enjoy that delightful aroma filling your kitchen as the corn roasts beautifully.
6. Remove from the oven and carefully unwrap the foil. Be cautious of hot steam escaping—your perfectly cooked corn awaits!
7. Brush with melted butter and season with salt, pepper, and paprika if desired. This final touch adds a rich flavor that enhances those sweet kernels beautifully.
Optional: Serve with fresh herbs or a squeeze of lime for an extra burst of flavor!
Exact quantities are listed in the recipe card below.
Tips for the Best corn on the cob in the oven
- Choose Fresh Corn: Select ears of corn that are bright green and tightly wrapped. Fresh corn will yield sweeter and juicier results.
- Seal Tightly: Ensure each ear of corn is wrapped securely in aluminum foil to trap steam, preventing dryness during baking.
- Butter Brilliance: Brush the corn generously with melted butter right after unwrapping to enhance flavor and moisture.
- Seasoning Balance: Taste your corn before adding more salt or pepper. Start light, as you can always add but can’t take away!
- Avoid Overcooking: Stick to 30 minutes at 400°F; overbaking can lead to tough kernels. Check for doneness by squeezing the corn gently.
How to Store and Freeze corn on the cob in the oven
- Room Temperature: Enjoy your roasted corn on the cob in the oven fresh, but if you have leftovers, they can sit out for no longer than 2 hours.
- Fridge: Store leftover corn on the cob in an airtight container or tightly wrapped in foil for up to 3 days. This helps retain moisture and flavor.
- Freezer: If you want to keep it longer, wrap each ear of corn tightly in plastic wrap and then in aluminum foil. Frozen corn can last up to 6 months.
- Reheating: To reheat, place the corn on the cob in the oven at 350°F for about 10-15 minutes, or until heated through. Enjoy that summer flavor again!
corn on the cob in the oven Variations
Feel free to get creative and customize this dish to suit your taste buds!
- Herbed Butter: Mix 4 tablespoons of melted butter with fresh herbs like parsley or cilantro for a refreshing twist. A sprinkle of lemon zest adds brightness, elevating your corn experience.
- Spicy Kick: Add 1 teaspoon of cayenne pepper or chili powder to the melted butter for a fiery flavor. This will give your corn a delightful heat, making it irresistible for spice lovers.
- Cheesy Delight: After roasting, sprinkle freshly grated Parmesan or crumbled feta cheese over your corn. The cheesy topping melts beautifully, creating an indulgent treat that pairs perfectly with summer gatherings.
- Smoky Flavor: Incorporate smoked paprika instead of regular paprika for a deeper, more intense flavor. This option brings a barbecue essence to your corn that’s simply captivating.
- Sweet & Savory: Drizzle honey or maple syrup over the buttered corn before roasting. The sweet glaze caramelizes slightly, creating a delicious contrast with the savory seasoning.
- Garlic Lovers: Stir minced garlic into the melted butter for an aromatic enhancement. The rich garlic flavor infuses every bite, making it a must-try for fans of all things garlicky.
- Zesty Lime: Squeeze fresh lime juice over your finished corn and sprinkle with lime zest. This bright touch gives a refreshing zing that complements the buttery goodness perfectly.
- Nutty Crunch: Top with crushed nuts like almonds or pecans after roasting for added texture. The nutty crunch creates an exciting contrast with the tender corn, making each bite delightful.
Make Ahead Options

If you’re looking to simplify your summer barbecues, this corn on the cob in the oven recipe is perfect for meal prep. You can husk and clean the corn up to 24 hours in advance, ensuring you save time when dinnertime rolls around. Additionally, you can melt the butter and mix in the salt, pepper, and paprika a day ahead, storing it in an airtight container in the fridge. When you’re ready to cook, simply wrap each ear of corn tightly in aluminum foil and follow through with baking instructions as outlined: place on a baking sheet and bake at 400°F (200°C) for 30 minutes. Just remember to brush with your pre-prepared buttery seasoning right before serving, and you’ll have a delicious side dish ready in no time!
corn on the cob in the oven Recipe FAQs
How do I choose the best corn on the cob?
Look for bright green husks that are tightly wrapped around the kernels. The silk should be slightly sticky and brown, indicating freshness. When you peel back a few layers, the kernels should be plump and milky when punctured. For this recipe, 4 ears will serve about 4 people beautifully!
Can I use frozen corn for this recipe?
While fresh corn on the cob is ideal for this dish, you can use frozen corn if needed. Just remember to thaw it first and adjust your cooking time—frozen corn may need less time in the oven, so keep an eye on it after about 20 minutes.
What’s the best way to store leftover roasted corn?
If you have any leftovers, let them cool completely before wrapping them tightly in plastic wrap or placing them in an airtight container. They’ll stay good in the fridge for up to 3 days. Simply reheat them in the oven at 350°F (175°C) for about 10 minutes to bring back that delicious buttery flavor.
Can I make this recipe dairy-free?
Absolutely! You can substitute the butter with a dairy-free alternative, such as olive oil or coconut oil, which will still give your corn a lovely richness. Use about 4 tablespoons of your chosen oil and feel free to experiment with additional herbs or spices for extra flavor.
What should I do if my corn doesn’t cook evenly?
If you find that some ears are undercooked while others are perfectly tender, it could be due to uneven heat distribution in your oven. To combat this, try rotating the baking sheet halfway through cooking—around the 15-minute mark—to ensure all ears get equal exposure to heat.
How many calories are in each serving of this roasted corn on the cob?
Each ear of delicious roasted corn comes in at approximately 150 calories per serving when prepared with butter and seasonings. It’s a delightful side that adds not just flavor but also a touch of summer nostalgia to any meal!
Corn on the Cob in the Oven
Ingredients
Method
- Preheat the oven to 400°F (200°C).
- Husk the corn and remove all silk strands.
- Wrap each ear of corn in aluminum foil, sealing tightly.
- Place the wrapped corn on a baking sheet.
- Bake in the preheated oven for 30 minutes.
- Remove from oven and carefully unwrap the foil.
- Brush with melted butter and season with salt, pepper, and paprika if desired.