
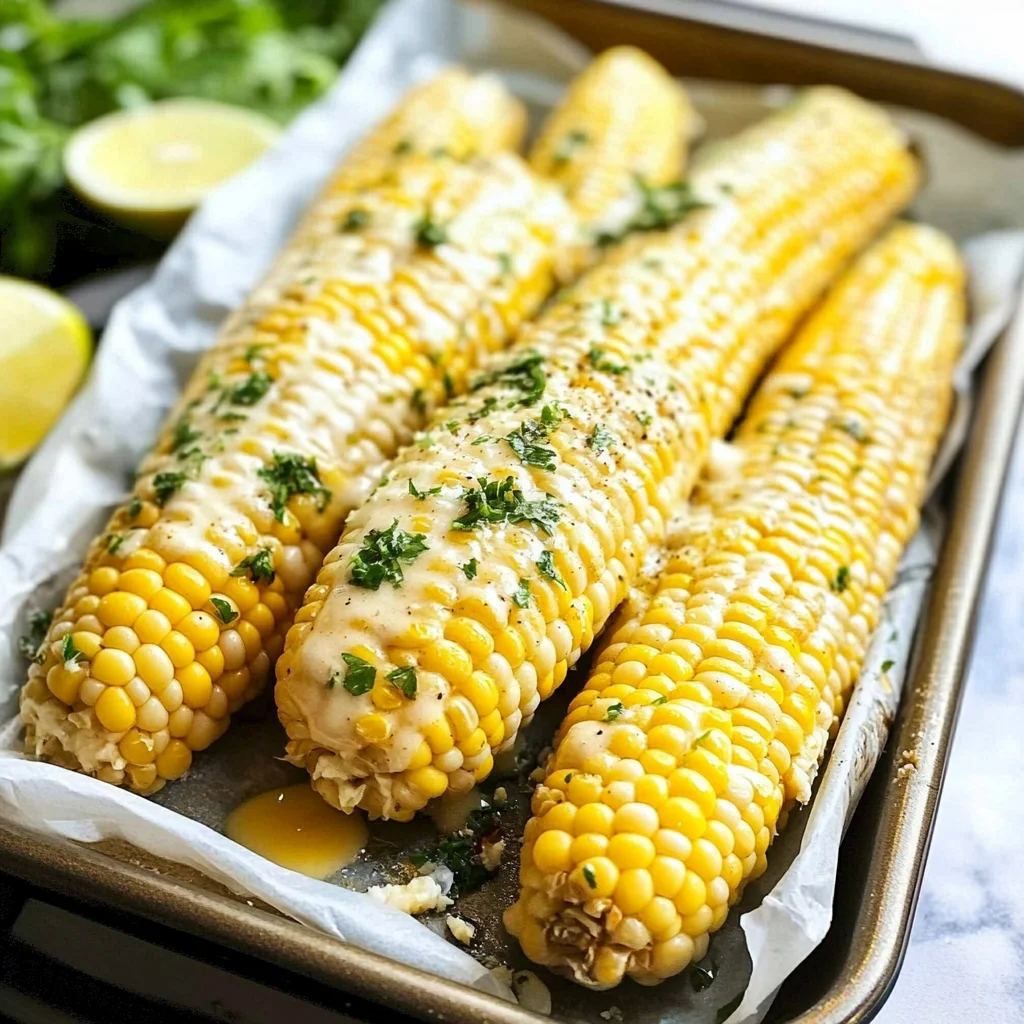
Imagine biting into a perfectly roasted ear of corn on the cob in the oven, where each kernel bursts with sweetness and that smoky, buttery aroma wafts through the air, instantly transporting you to a sun-soaked summer barbecue. The golden kernels glisten under a light sprinkle of salt, and as you sink your teeth into that juicy goodness, it feels like every bite is a celebration of flavor and nostalgia.
Remember those lazy afternoons spent with family, where laughter mingled with the sizzling sounds of the grill? Corn on the cob in the oven is not just a side dish; it’s a simple yet delightful way to elevate any meal or gathering. Whether you’re hosting friends for a backyard cookout or enjoying a cozy dinner at home, this recipe promises to be the highlight on your table, bringing joy and mouthwatering satisfaction to every occasion.
Why Is corn on the cob in the oven So Irresistibly Good?
Imagine biting into perfectly roasted kernels, bursting with flavor. This recipe elevates your summer barbecues with minimal effort! Using just fresh corn, melted butter, and simple seasonings, it’s a breeze to prepare. In only 30 minutes, you’ll have a delicious side dish that impresses every guest. Plus, it’s versatile—add your favorite spices for a unique twist. Enjoy the ultimate crowd-pleaser that will have everyone coming back for more!
corn on the cob in the oven Ingredients
For the Corn
- 4 ears fresh corn on the cob – Husked and cleaned for a sweet, juicy flavor that shines through when roasted.
For the Butter
- 4 tablespoons unsalted butter – Melted to give your corn a rich, buttery taste that elevates every bite.
For the Seasoning
- 1 teaspoon salt – Enhances the natural sweetness of the corn for a balanced flavor.
- 1 teaspoon black pepper – Adds a hint of spice to complement the butter and corn.
- 1 teaspoon paprika (Optional) – A dash of color and smokiness that brings an extra layer of flavor to your corn on the cob in the oven.
How to Make corn on the cob in the oven

1. Preheat your oven to 400°F (200°C). This step is crucial as it ensures that your corn cooks evenly and develops that delicious roasted flavor.
2. Husk the corn and remove all silk strands. Take your time with this step; you want each ear of fresh corn on the cob to be clean and ready for roasting.
3. Wrap each ear of corn in aluminum foil. This not only helps retain moisture but also allows the corn to steam while baking, keeping it tender and juicy.
4. Place the wrapped corn on a baking sheet. This makes it easy to transfer in and out of the oven without making a mess.
5. Bake in the preheated oven for 30 minutes. The aroma will start filling your kitchen, signaling that summer is just a bite away!
6. Remove from the oven and carefully unwrap the foil. Be cautious of the steam escaping—it’s hot! You’ll see beautifully roasted corn on the cob.
7. Brush the corn with melted butter and sprinkle with salt, pepper, and paprika if desired. This final touch elevates your dish, adding richness and flavor that’s irresistible!
Optional: Garnish with fresh herbs for an extra pop of flavor!
Exact quantities are listed in the recipe card below.
Expert Tips
- Choose Fresh Corn: Select ears that are bright green and tightly wrapped. Fresh corn will taste sweeter and yield better results when roasted.
- Silk Removal: Be thorough when removing silk strands; any leftover silk can burn during baking, impacting flavor and presentation.
- Wrapping Technique: Wrap the corn tightly in aluminum foil to trap steam, ensuring even cooking and juicy kernels. Loose wraps can lead to dry corn.
- Butter Timing: Brush melted butter on right after unwrapping for maximum flavor absorption. Letting it sit too long may cause dryness.
- Seasoning Flexibility: Feel free to experiment with herbs or spices beyond paprika! Garlic powder or chili flakes can add a delightful twist to your corn on the cob in the oven.
- Watch Cooking Time: Ovens vary, so check your corn at 25 minutes. Overbaking can lead to tough kernels, while underbaking may result in raw centers.
How to Store and Freeze corn on the cob in the oven
- Room Temperature: Enjoy freshly roasted corn on the cob in the oven right away for the best flavor. If left out, consume within 2 hours.
- Fridge: Store leftover corn on the cob in an airtight container or tightly wrapped in foil. It will stay fresh for up to 3 days.
- Freezer: For longer storage, wrap individual ears of corn in plastic wrap and then place them in a freezer bag. They can be frozen for up to 6 months.
- Reheating: To reheat, place the corn on the cob in the oven at 350°F (175°C) for about 10-15 minutes until warmed through. Enjoy it like new!
corn on the cob in the oven Your Way
Feel free to explore these delightful twists and make this dish truly yours!
- Herb-Infused: Swap melted butter with olive oil and add fresh herbs like thyme or rosemary for a fragrant touch. This substitution brings an aromatic lift that elevates the corn’s natural sweetness. Picture a sunny picnic with herbaceous notes wafting in the air.
- Spicy Kick: Mix in cayenne pepper or chili powder with the original seasoning for a fiery flavor. The heat from these spices pairs beautifully with the sweet corn, creating an exciting taste explosion. Your taste buds will dance with joy!
- Cheesy Delight: After roasting, sprinkle freshly grated Parmesan or crumbled feta cheese over the corn. This twist adds a savory richness that complements the sweet kernels perfectly. Imagine each bite bursting with creamy goodness!
- Zesty Lime: Drizzle lime juice over your roasted corn and sprinkle some zest for a refreshing twist. The citrusy brightness cuts through the richness of butter, making it a vibrant side dish. Each bite will transport you to a beachside taco stand!
- Sweet & Smoky: Brush the corn with honey before roasting and add smoked paprika for a sweet and savory combination. This variation creates a captivating contrast of flavors that will impress all your guests. You’ll find yourself going back for seconds!
- Maple Glaze: Substitute butter with maple syrup for a unique, sweet glaze that caramelizes beautifully during roasting. The result is an irresistible combination of smoky sweetness that’ll have everyone raving about your culinary skills.
- Garlic Butter: Infuse your melted butter with minced garlic for an aromatic upgrade that packs a punch. The garlic’s bold flavor melds perfectly with the sweetness of corn, creating an unforgettable side dish. Your family will be asking for this version at every gathering!
Make Ahead Options

If you’re looking to streamline your summer barbecues, this corn on the cob in the oven recipe is perfect for meal prep! You can husk the corn and remove all silk strands up to 24 hours in advance, wrapping each ear tightly in aluminum foil. Melt the butter and mix in the salt, pepper, and optional paprika ahead of time too; just store it in the fridge for up to 3 days. When you’re ready to serve, simply preheat your oven to 400°F (200°C), place the wrapped corn on a baking sheet, and bake for 30 minutes. Once it’s done, unwrap, brush with your prepared butter mixture, and enjoy that fresh-off-the-grill flavor without the fuss! This way, you save valuable time while ensuring deliciously roasted corn on the cob every time.
corn on the cob in the oven Recipe FAQs
What type of corn should I use for this recipe?
For the best results, opt for fresh, sweet corn on the cob. Look for ears that are plump with tightly wrapped husks and moist silk strands. The fresher the corn, the sweeter and more flavorful your dish will be!
How do I store leftover roasted corn on the cob?
If you have any leftover corn, allow it to cool completely before storing it. Wrap each ear in plastic wrap or place it in an airtight container and refrigerate. It should stay fresh for up to 3 days.
Can I freeze roasted corn on the cob?
Absolutely! To freeze, let the roasted corn cool down, then wrap each ear tightly in foil or plastic wrap before placing them in a freezer bag. They can be stored for up to 6 months. When you’re ready to enjoy them again, just thaw overnight in the fridge and reheat in the oven or microwave.
What if my corn is overcooked?
If your corn ends up being overcooked, it might become tough and chewy. To remedy this, try brushing it with melted butter or olive oil immediately after unwrapping and sprinkle with salt and pepper to enhance its flavor. Serve with a squeeze of lemon juice to brighten it up!
How can I adjust the seasoning for dietary preferences?
Feel free to customize the seasoning to suit your taste! If you’re watching your sodium intake, you can reduce or omit the salt entirely. For those looking for a bit more spice, consider adding cayenne pepper or some chili powder instead of paprika for an extra kick.
What is the serving size for this recipe?
This recipe makes four servings, with each serving containing about 150 calories. It’s perfect as a side dish at summer barbecues or as a delightful snack any time of year!
Corn on the Cob in the Oven
Ingredients
Method
- Preheat the oven to 400°F (200°C).
- Husk the corn and remove all silk strands.
- Wrap each ear of corn in aluminum foil.
- Place the wrapped corn on a baking sheet.
- Bake in the preheated oven for 30 minutes.
- Remove from the oven and carefully unwrap the foil.
- Brush the corn with melted butter and sprinkle with salt, pepper, and paprika if desired.